padding
US /ˈpædɪŋ/
・UK /ˈpædɪŋ/
B1 中級
v.t./i.動詞 (他動詞/自動詞)敷き物をする
Padding the bleachers will add more comfort and protection that fans would surely appreciate.
v.t./i.動詞 (他動詞/自動詞)水増し
The clinic is padding their clients with additional charges that are unnecessary
v.i.自動詞そうっと歩く
The tiger is padding after the chicken he wants for dinner
動画字幕
飛行機の足元はなぜ狭くなったのか (How airplane legroom got so tight)

- That means changing the design of the seats to literally take out padding and depth from your seat back.
それ以上でなければ、そうしてもいいと思う。
- Yeah, that means changing the design of the seats to literally take out padding and depth from your seat back.
ああ、それはシートのデザインを変えるということだ文字通り、シートバックからパッドと深さを取り除く。
カナダ人からアイスホッケーを学ぼう (Learn about Ice Hockey from a Canadian)

- But they have a lot of padding, because if the puck hits you and you're not protected, you don't have padding, it's very, very painful.
もしパックが体に当たって、プロテクションがなかったり、パッドがなかったりしたら、とてもとても痛いからね。
- Also, sometimes the sticks fly around, so if a stick hits you and you don't have padding, it could be very painful.
また、スティックが飛んでくることもあるので、パッドがないときにスティックが当たると、とても痛いかもしれない。
初心者向けFigmaオートレイアウトチュートリアル(2025年) (Figma Auto Layout Tutorial for Beginners (2025))
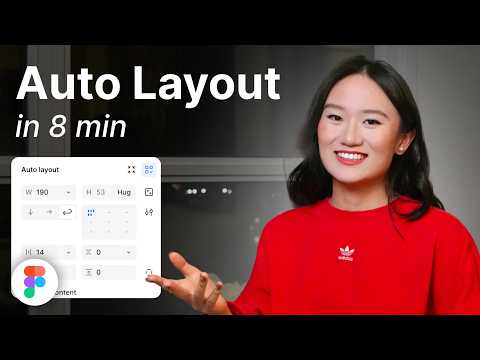
- This arranges your elements vertically The third one is Horizontal It arranges your elements horizontally The fourth one is Grid This is a new update still in beta It allows you to edit the layout in a grid format We'll go over each of these in detail Don't worry, by the end of this video, you'll understand how to use every single button here Let us start with the Freeform setting You'll see W and H right below this button W stands for Width and H stands for Height You can use these fields to adjust the size of your element You can type in a number, hover over the letter and drag to change it Or do it the most organic way Hover over the edge of the element and drag until you see a number you like I like multiples of 4 To the right, you'll see a square icon If you click it, it locks the aspect ratio of the element So the width and height stay proportional Let's say you are redesigning a YouTube thumbnail A YouTube thumbnail has a specific aspect ratio So locking it can prevent your cat, your kid, and mostly you from messing it up One very, very important thing Make sure you select the right layer In a real design project, you'll have so many layers So if you want to lock the aspect ratio of this circle, let's say Make sure to select the circle, not the frame That way, your circle will stay perfectly as a circle Not too fat, not too short Below Width, you'll find a field to adjust the gap between elements This only appears in freeform mode when your elements share the same gap At the bottom, you'll see the clip content checkbox This is super helpful when your frame is smaller than the elements inside For example, in a carousel design Checking clip content will hide the parts of the elements that extend outside the frame Alright, next let's move on to vertical and horizontal layouts These two are really similar So let's take a look at the horizontal one When you select a horizontal layout A wrap icon will appear on the right If you click it, the elements inside the frame will automatically wrap into multiple rows Perfect for when there's not enough space in a single line Below that, you'll see width and height settings Each with a drop-down If you click the drop-down, you can set the size to hug This makes the frame automatically adjust to fit its contents For example, if you add a new circle to the frame The width will automatically expand to hug the new element You can also set minimum or maximum values for width and height Let's say you don't want the frame to be wider than 750 pixels Just set the max width to 750 And even if you add more elements, the frame won't go beyond that limit Right below width, you'll see nine alignment options for your elements inside the frame These let you align your content to the top, center, bottom, left, right Basically any corner or edge you want You might not notice much difference right now if your frame is hugging the elements But once the frame is bigger, this alignment will become very obvious Next is the gap setting Click the drop-down and you'll see an option to set it to auto This automatically adjusts the space between elements to fill the frame evenly So satisfying to see everything snap into place Below that are your padding settings Padding is the space between the edge of the frame and the element inside it By default, padding is applied equally on parallel sides But if you click the little toggle next to it, you can customize the padding for each side Just like this Next, let's move to grid A brand new and still in beta feature in Figma Alright, I have a love-hate relationship with this, okay?
これは要素を縦に並べます。3つ目はHorizontal(横)です。これは要素を横に並べます。4つ目はGrid(グリッド)です。これはまだベータ版の新しいアップデートで、グリッド形式でレイアウトを編集できます、このボタンのすぐ下に、WとHがあります。 Wは幅、Hは高さを表します、YouTubeのサムネイルをデザインし直すとしましょう。YouTubeのサムネイルは特定の縦横比を持っています、フレームではなく、円を選択してください。そうすれば、円は円として完璧に保たれます。太すぎず、短すぎず。 幅の下には、要素
- Because it was released literally one day after I finished editing my last auto layout tutorial So now here I am redoing everything all over again and throwing my last edit to trash But hey, it's a powerful feature With grid, you can snap your elements into a clean grid layout You can also set your elements to span multiple rows or columns Think about designing bento boxes on a website But I still don't like bento box, bleh You can also manually adjust the width and height of each row or column Like this On the right panel, you'll find controls to set up as many rows and columns as you want Just click this big grid thingy And with the grid layout, you can also select the element's unit And set their width and height to fill container I love this setting Now, whenever you change the gap size or resize the frame All the elements will adjust automatically to fill in those grids So satisfying There is one more button The auto layout settings button on the right Click this opens more controls Let's try an example by adding a thick stroke to these circles By default, the stroke will go outside the frame If you change the dropdown to include the stroke in the layout The strokes will stay inside the frame So this is what it does I actually haven't had a chance to use this Now, let us set the gap between elements to a negative number Think about Instagram like where the profile pictures overlap You can use the dropdown here to switch between Whether you want the first or last element to show on top Just one more setting left For this one, let's add an icon and some text If you use auto layout, they'll align automatically And if you make the text bigger, the layout will adjust like this But if you turn on align text baseline The icon will align with the baseline of the text No matter how big or small the text gets However, this doesn't work well with icons that have padding inside Which is like all of the icons I use So I don't know how to use this Now let's talk about using auto layout in a real-world scenario This is really really important So pay attention Take this YouTube card element as an example How would you fix this layout using auto layout?
前回の自動レイアウトのチュートリアルを編集し終えた文字通り1日後にリリースされたので、今ここでもう一度すべてをやり直し、前回の編集をゴミ箱に捨てているところです、グリッドレイアウトでは、要素の単位を選択して、コンテナを埋める幅と高さを設定することもできる、デフォルトでは、ストロークは枠外に出ますが、ドロップダウンを変更してレイアウトにストロークを含めると、ストロークは枠内に収まります、テキストを大きくすると、このようにレイアウトが調整されます。しかし、テキストのベースラインを揃えるをオンにすると、テキスト

Lo & Sons Melrose Rucksack - スタイリッシュなトラベルバッグ レビュー (Lo & Sons Melrose Rucksack - Stylish Travel Bag Review)

- So when I'm not traveling or I'm using this bag and I'm carrying it around on my shoulders I really love that the straps have a lot of padding in it and also like this diamond like quilted pattern that it has I don't know if it's if it's for like so it doesn't slip or if that's just part of the design aesthetically pleasing design that they put on there.
旅行中でなくても、このバッグを肩にかけて持ち歩くときは、ストラップにたくさんのパッドが入っているのがとても気に入っているし、このダイヤモンドのようなキルティング模様も気に入っている。
- So when I'm not traveling or if I'm using this bag and I'm carrying it around on my shoulders, I really love that the straps have a lot of padding in it.
バッグの上部にはハンドルがあり、肩にかけずにこのように背負う必要がある場合、このように持つ代わりにハンドルがあると本当にありがたい。
タイム・マシン 第1部 H・G・ウェルズ (第1章~第6章) (Part 1 - The Time Machine Audiobook by H. G. Wells (Chs 01-06))

- Again I remarked his lameness and the soft padding sound of his footfall,
我々はすべて、彼に続いて困惑しかし懐疑的な、そしてどのようにそこにどのように影の踊り、
- Again I remarked his lameness and the soft padding sound of his footfall, and standing
再び私は彼の跛行と彼の足音のソフトパッドの音を述べた、と立って
旅行&Vlogに最適なカメラバックパック9選 | ギアレビュー&ヒント (9 Best Camera BackPacks For Travel & Vlogging | Gear Review & Tips)

- It's got a lot of padding, and it's a very casual looking backpack.
パッドがたくさん入っていて、とてもカジュアルなバックパックだ。
- It's got a lot of padding, and it's a very kind of casual-looking backpack.
しかし、このバックパックの悪い点は、カメラポーチが背面からアクセスできることだ。
Lo and Sons Catalina Supreme トートバッグとWestholmeバックパック レビュー - Rowledgeアップデートも! (Lo and Sons Catalina Supreme Tote Bag and Westholme Backpack Review - Plus Rowledge Update!)

- I've never had a problem where I felt like my shoulders hurt with this backpack because the padding is really nice on this.
このバックパックはパッドがとても良いので、肩が痛いと感じたことは一度もない。
- I've never had a problem where I felt like my shoulders hurt with this backpack because the padding is really nice on this.
携帯電話とアップルウォッチ用の充電器も持っている。
ソニー・ボーズの新ヘッドホン競合!:Edifier WH950NB (Sony and Bose's New Headphone Competitor! : Edifier WH950NB)
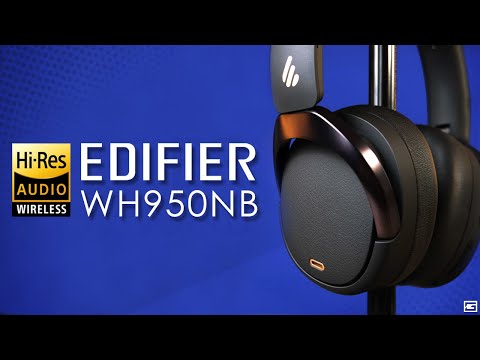
- You have an airline adapter if you're going to use these plugged into an airplane while you're traveling which also means that it comes with a three and a half millimeter headphone cable and it also comes with a USB-C cable to charge these but jumping over to looking at the headphones now this is another thing that is similar with the the headband actually has like a metal or aluminum material right up top but luckily there is some really nice pleather padding underneath that they use that same pleather material on the earpads which again feels like Sony's XM5s and XM4s earpads so there's memory foam it's just really really comfortable there's not a whole lot of weight with these headphones the earpads do swivel and the headphones actually do fold flat so you can just kind of get these to be pretty compact so you can fit them in a bag or the case pretty easily but I do like that on the outside although they also have vents that look like the Sony headphones the texture on the ear cups it kind of gives it a really nice premium look now as far as the inputs and the buttons and all that on the left side you have your three and a half millimeter headphone jack input and then on the right side you have that USB-C input and then all of your buttons are also located on the right side and really there's not a whole lot of buttons now I do wish that they went with a different material I think this is the one thing that kind of pulls from the look of these but I am glad that they did not go with the touch or swipe gestures I'm just not the biggest fan of those but the buttons what they do is you have a mode button you can switch between different modes which we'll talk about you have a multi-purpose button in the middle which allows you to play pause skip your tracks forward go backwards and then you have your volume up and down so you have all of your controls right there on the right ear cup and overall they just feel and look like a premium pair of headphones now some of the features on these like I mentioned at the beginning of the video these are high-res wireless certified they do have that LDAC support which I'm a huge fan of I've been using this and a lot of earbuds I've been testing so I've kind of gotten used to getting the most out of what I'm listening to now it also has Bluetooth 5.3 and it has Google's fast pair so if you're using an Android device you will see the pop-up on the screen come up as soon as you turn the headphones on you can also download Edifier's app which I highly recommend the app is giving you a lot of different controls it allows you to keep the headphones updated you also have multi-point connection if you want to be connected to more than one device at a time but you also have to go into the app to turn the LDAC mode on now if you have LDAC on it turns your multi-point connection off you cannot do both at the same time and then it also allows you to go between your different noise canceling levels you have a high level a low level and it also has a wind reduction mode and if you switch it into transparency mode within the app you can turn the adjuster up or down depending on how much you want to allow your surroundings to be picked up by the microphones and I was also very impressed with this feature now some other things is it also has the ability to switch it from a music mode to a gaming mode to a movie mode now this slightly adjusts the EQ depending on which mode you're in but it also cuts down latency if you're going to be gaming on your mobile device or you're going to be watching a movie or a video so I also like the fact that you have these different options to switch between and then also in the app you can go in and customize the mode button so if you don't want it to go from one mode to the other or you're wanting it to do more than just go from noise canceling to transparency you can go to the other noise canceling modes whatever you have this customization within the app and then the only other thing is you do have the ability to set safe volume so it keeps it under 85 decibels and it keeps you from just blaring the headphones and blasting your eardrums out so if you have a kid that's using these and you just kind of want to limit them it's nice that you have this control as well now moving over to talking about the noise canceling and the transparency mode there are three different noise canceling modes you basically have high noise canceling low noise canceling there is a wind reduction mode so if you're going to use these outdoors it will keep the wind from affecting your audio like in some other headphones and the high and low noise canceling I noticed is very very similar and the noise it's not on the level of sony or bose but it is also not half as good considering where it's priced at it is much better than that it does a very good job of blocking out all of the usual like ac units engine noises like you know refrigerator like those low rumble sounds that are around you but it also takes it a step up and starts blocking out a decent amount of people talking so if you're going to use these like in a restaurant or a coffee shop you won't hear a lot of the dialogue going on around you now the transparency mode was also very impressive and just leaving it in the middle mode I was able to hear my surroundings very well I could carry on a conversation without taking the headphones off which is important because one feature that I wish that these had that they don't is there's no smart sensors so if you take your headphones off they do not pause they don't just go back to what you're listening to when you put them back on you are going to have to pause your headphones if you want it to stop where you're listening to them if you're going to take them off so again that's something that the higher brands have that I wish were in these now moving over to the battery life which is another area these are very impressive with if you use them with the noise canceling off you can squeeze about 55 hours out of these but if you use them with the noise canceling on it is going to bring them all the way down to 34 hours which you know is going to easily get people through a week definitely through a day if you just listen to 24 hours a day you're still going to have some juice left at the end of the day but if you do pick your headphones up and they're dead it also has one of the best fast charge features I've seen on a 10 minute charge you can get seven hours of use so if you're about to walk out the door and they're dead if you can wait 10 minutes you can almost get a full workday's worth of battery life and again that was just impressive to see on this pair now if you are going to have these headphones on and take phone calls it is using four microphones total it's also using the environmental noise canceling to try to block out a lot of your surroundings and this is another area that I was also very impressed with but you guys can be a judge by listening to a test here all right guys so here is a mic test using the edifier headphones I think overall it does a pretty decent job of picking up my voice I do notice some digital noise here and there so this is what it would like if you were to take a call and so now here's the mic test with a crowd noise being played which you can hear here and so this is what it would sound like if you were to take a call in public so now let's talk about the sound the sound on these are fantastic but I gotta tell you how I had these set up I always listened to them in LDAC mode and I noticed that if I had the noise canceling on I needed to have the EQ setting to classic and if I had the noise canceling off I needed to have the EQ setting to dynamic and the reason for this is if the noise canceling is on it kind of closes it in a little bit but it adds some warmth to the sound and it adds some boominess to the bass and I think it kind of takes away from the brightness of the treble but if you have it in classic mode that kind of just offsets that but if you listen to them with the noise canceling off and listen to them in dynamic mode which is my personal preference that seemed to hit the sweet spot it seemed to have a really nice bass bass that can compete with the Sony and the Bose and it also had some really clean bright trebles now it's not treble that gets harsh it's not one of those that gets ear fatiguing or anything like that it just balances out very well with that low end and I think it makes it really comparable to the Sony and the Bose when it comes to audio but the mids I felt on these were better than both the Sony and the Bose I felt like vocalists just stood out more there was a lot more characteristics in male and female vocalists being brought out and no matter what genre I was listening to I never felt like the mids took a step back so I was really impressed with the way that these were tuned but not the way that they were tuned out of the box you you have to go in and mess around with it a little bit so do keep that in mind and when it comes to the sound stage and the sound imaging this also surprised me because it did sound very open as long as it's not in noise cancelling mode now noise cancelling again it just seems to close it in a little bit now I know that's on purpose it's meant to isolate you from everything else but it just did not sound as open when I had the noise cancelling turned off so overall I was very impressed with the sound quality and really my overall opinion is this the look the feel and the sound are all very premium except for the I wish that they just went with a different texture or just went with the swipe controls even though I'm not a huge fan of that but if you are just locked in on wanting really good sound and really good noise cancelling but you just don't want to dump three or four hundred dollars into a pair of headphones this one right here pretty much matches everything else I mean the sound on these are excellent having LDAC and having that high-res audio is really just making sure that you're getting the most out of what you're listening to and I've had an excellent time while testing these and I think at the price point it's going to be hard to find anything that compares to these because I don't feel like the Soundcore headphones match up with these I don't feel like even one more's headphones match up with these which have been pairs that I've been impressed with but the Edifier just kind of takes it a notch further and makes it more comparable to the more expensive headphones but guys that wraps up my video on the Edifier WH-950NBs thank you so much for checking out this video thank you so much for checking out all the other videos and as always make sure to stay tuned for more
旅行中に飛行機に接続して使用する場合は、航空会社用のアダプターが付属している。ヘッドバンドは金属かアルミニウムのような素材が上部にありますが、幸いなことに、その下には本当に素敵なプリーザーのパッドがあり、彼らはまた、ソニーのXM5sやXM4sのイヤーパッドのように感じるイヤーパッドにも同じプリーザー素材を使用しています。このヘッドホンはイヤーパッドが回転し、ヘッドホンが平らに折りたためるので、かなりコンパクトになり、バッグやケースに簡単に入れることができます。C入力があり、すべてのボタンも右側に配置され、
- but luckily there is some really nice pleather padding underneath that.