Footer

    Download on the App StoreGet it on Google Play

    VoiceTube とは

    • VoiceTube について
    • 学習サービス紹介
    • 採用情報
    • よくある質問
    • ホットタグ

    サービス一覧

    • スピーキングチャレンジ
    • 保存
    • VoiceTube Hero
    • 法人向け VoiceTube
    • 単語検索
    • 動画をインポート
    • ブログ

    お勧めチャンネル

    レベル別

    • A1 初級
    • A2 初級
    • B1 中級
    • B2 中上級
    • C1 上級
    • C2 上級

    プライバシー˙規約˙
    ©2026 VoiceTube Corporation. All rights reserved

    toggle

    US /ˈtɑɡəl/

    ・

    UK /'tɒɡl/

    C1 上級
    n.名詞トグル、ON/OFFなど同じ操作によって二つの状態を交互に切り替えられるような仕組みのこと
    The computer repairman installed a toggle to safeguard my computer
    n.名詞時計鎖の一端についている留め棒など
    The jeweler added a toggle to fix the necklace
    v.t.他動詞留め棒をつける
    v.t.他動詞スイッチを切り替える
    Don't toggle the thermostat too much or you'll break it

    動画字幕

    「『おい、マジかよ!』:トランプ氏のイランへの冒涜的な脅迫、CNNパネルを唖然とさせる」 (‘Ok, wow!’: Trump’s profane Iran threat stuns CNN panel)

    14:20「『おい、マジかよ!』:トランプ氏のイランへの冒涜的な脅迫、CNNパネルを唖然とさせる」 (‘Ok, wow!’: Trump’s profane Iran threat stuns CNN panel)
    • We have seen this sort of toggle between saying, "This is going to be wrapped up in a couple of weeks," and escalating threats.

      「数週間で終わるだろう」と言ったり、脅迫をエスカレートさせたりするのを繰り返してきました。

    • We have seen this sort of toggle between saying, "This is going to be wrapped up in a couple of weeks," and escalating threats.

      「数週間で終わるだろう」と言ったり、脅迫をエスカレートさせたりするのを繰り返してきました。

    B1 中級

    イギリス航空会社のエレガントな飛行機の安全ビデオ

    05:23イギリス航空会社のエレガントな飛行機の安全ビデオ
    • To inflate, pull the red toggle as shown and the air can be topped up by using this mouthpiece.

      膨張させるには、赤いひもを引いてください。また、この口器を使ってさらに空気を入れることができます。

    • To inflate, pull the red toggle as shown, and

      この赤いハンドルは緊急時のみ使用し、その使用方法はスイートの中にあります。

    B1 中級

    【9月22日発売】新型 iPhone 15 / Pro 価格と特徴を徹底解説!
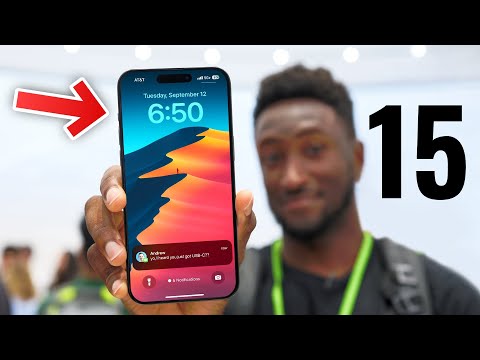
    13:23【9月22日発売】新型 iPhone 15 / Pro 価格と特徴を徹底解説!
    • You could also do flashlight turning on or opening up voice memos, or it can toggle the magnifier.

      懐中電灯の点灯やボイスメモを開くこともできるし、拡大鏡の切り替えもできます。

    • You could also do flashlight turning on or opening up voice memos, or it can toggle the magnifier.

      壁掛け充電器、編組の USB-C ケーブルが豊富にあります。

    B1 中級

    ハム符号とは?誤り訂正の起源 (But what are Hamming codes? The origin of error correction)
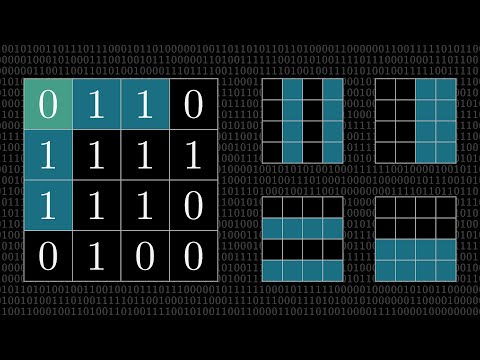
    20:05ハム符号とは?誤り訂正の起源 (But what are Hamming codes? The origin of error correction)
    • However, if there's two errors, then the overall parity is going to toggle back to being even,

      そして最初は、ブロック内の16個の位置のうち1つを特定するのに最適だと感じられるでしょう。

    • However, if there's two errors, then the overall parity is going to toggle back to being even.

      しかし、もし2つのエラーがあった場合、全体のパリティは再び偶数に戻ります。

    B1 中級

    【モチベ】人生はゲーム!必勝法とは!

    09:01【モチベ】人生はゲーム!必勝法とは!
    • So here is the third and final cheat code: "Learn how to toggle between focus and diffuse mode." Your character has two states.

      そこで私が考える優先順位付けの方法は、すべての仕事を3つの分野に分類することだ。

    • Learn how to toggle between focus and diffuse mode.

      フォーカスモードとディフューズモードを切り替える方法を学ぶ。

    B1 中級

    Photoshopチュートリアル - 画像からオブジェクトを削除する方法 (Photoshop Tutorial - Removing objects from images)
    19:03Photoshopチュートリアル - 画像からオブジェクトを削除する方法 (Photoshop Tutorial - Removing objects from images)
    • All right just a little bit more right up here and I'll use Command-0 in order to zoom out and we can toggle the visibility of this layer in the layers panel.

      Command-0でズームアウトし、レイヤーパネルでこのレイヤーの表示を切り替える。

    • And we can toggle the visibility of this layer in the Layers panel.

      拡大したければ、ここにあるスライダーを使うこともできるが、私はこのままでいいと思う。

    B1 中級

    初心者向けFigmaオートレイアウトチュートリアル(2025年) (Figma Auto Layout Tutorial for Beginners (2025))

    08:51初心者向けFigmaオートレイアウトチュートリアル(2025年) (Figma Auto Layout Tutorial for Beginners (2025))
    • This arranges your elements vertically The third one is Horizontal It arranges your elements horizontally The fourth one is Grid This is a new update still in beta It allows you to edit the layout in a grid format We'll go over each of these in detail Don't worry, by the end of this video, you'll understand how to use every single button here Let us start with the Freeform setting You'll see W and H right below this button W stands for Width and H stands for Height You can use these fields to adjust the size of your element You can type in a number, hover over the letter and drag to change it Or do it the most organic way Hover over the edge of the element and drag until you see a number you like I like multiples of 4 To the right, you'll see a square icon If you click it, it locks the aspect ratio of the element So the width and height stay proportional Let's say you are redesigning a YouTube thumbnail A YouTube thumbnail has a specific aspect ratio So locking it can prevent your cat, your kid, and mostly you from messing it up One very, very important thing Make sure you select the right layer In a real design project, you'll have so many layers So if you want to lock the aspect ratio of this circle, let's say Make sure to select the circle, not the frame That way, your circle will stay perfectly as a circle Not too fat, not too short Below Width, you'll find a field to adjust the gap between elements This only appears in freeform mode when your elements share the same gap At the bottom, you'll see the clip content checkbox This is super helpful when your frame is smaller than the elements inside For example, in a carousel design Checking clip content will hide the parts of the elements that extend outside the frame Alright, next let's move on to vertical and horizontal layouts These two are really similar So let's take a look at the horizontal one When you select a horizontal layout A wrap icon will appear on the right If you click it, the elements inside the frame will automatically wrap into multiple rows Perfect for when there's not enough space in a single line Below that, you'll see width and height settings Each with a drop-down If you click the drop-down, you can set the size to hug This makes the frame automatically adjust to fit its contents For example, if you add a new circle to the frame The width will automatically expand to hug the new element You can also set minimum or maximum values for width and height Let's say you don't want the frame to be wider than 750 pixels Just set the max width to 750 And even if you add more elements, the frame won't go beyond that limit Right below width, you'll see nine alignment options for your elements inside the frame These let you align your content to the top, center, bottom, left, right Basically any corner or edge you want You might not notice much difference right now if your frame is hugging the elements But once the frame is bigger, this alignment will become very obvious Next is the gap setting Click the drop-down and you'll see an option to set it to auto This automatically adjusts the space between elements to fill the frame evenly So satisfying to see everything snap into place Below that are your padding settings Padding is the space between the edge of the frame and the element inside it By default, padding is applied equally on parallel sides But if you click the little toggle next to it, you can customize the padding for each side Just like this Next, let's move to grid A brand new and still in beta feature in Figma Alright, I have a love-hate relationship with this, okay?

      これは要素を縦に並べます。3つ目はHorizontal(横)です。これは要素を横に並べます。4つ目はGrid(グリッド)です。これはまだベータ版の新しいアップデートで、グリッド形式でレイアウトを編集できます、このボタンのすぐ下に、WとHがあります。 Wは幅、Hは高さを表します、YouTubeのサムネイルをデザインし直すとしましょう。YouTubeのサムネイルは特定の縦横比を持っています、フレームではなく、円を選択してください。そうすれば、円は円として完璧に保たれます。太すぎず、短すぎず。 幅の下には、要素

    • but if you click the little toggle next to it, you can customize the padding for each side, just like this.
    B1 中級

    学生におすすめの生産性向上アプリ - Notion (My Favourite Productivity App for Students - Notion)
    16:30学生におすすめの生産性向上アプリ - Notion (My Favourite Productivity App for Students - Notion)
    • And then within those, I've got these little toggle boxes.

      そして、その中に小さなトグルボックスがある。

    • And then I've hidden my notes on this particular topic underneath one of these toggle points.

      そして、このトピックのメモをこのトグルポイントの下に隠した。

    B1 中級

    不動産写真のコツ LightroomでエンフューズHDR合成によるポストプロセッシング (Real Estate Photography Tips Lightroom Post Processing With Enfuse HDR Blending)

    57:30不動産写真のコツ LightroomでエンフューズHDR合成によるポストプロセッシング (Real Estate Photography Tips Lightroom Post Processing With Enfuse HDR Blending)
    • If I click this little toggle switch and it says Sync here, that means that it's not going to auto sync the photos that I have selected.

      行うのは、色を調整することです

    • So I want to toggle it to make sure it says Auto Sync.

      温度です。それでは、始めます。右クリックして

    A2 初級

    トップ0.01%のCS2プレイヤーが自身のエイムルーティンを公開 (Aimlabs + KovaaK's 最適化設定) (Top 0.01% CS2 Player Shares His Aim Routine (Aimlabs + KovaaK's Optimized Settings))
    25:31トップ0.01%のCS2プレイヤーが自身のエイムルーティンを公開 (Aimlabs + KovaaK's 最適化設定) (Top 0.01% CS2 Player Shares His Aim Routine (Aimlabs + KovaaK's Optimized Settings))
    • Toggle kill sound for me is off, and toggle spawn sound also off.

      トグル・キル・サウンドはオフで、トグル・スポーン・サウンドもオフだ。

    • Toggle Kill Sound for me is off, and Toggle Spawn Sound also off.

      時々、オフにしたときに問題に気づくことがあるから、オンにしておくんだ。

    B1 中級