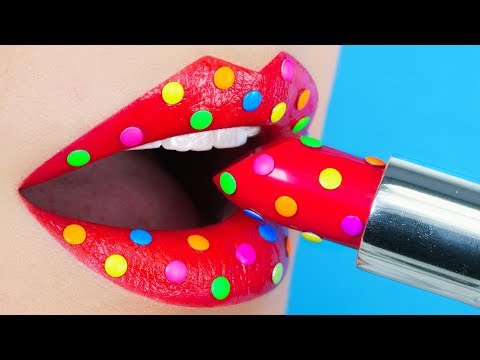
Placeholder Image

字幕表 動画を再生する

  • Not all makeup is edible, but yours can be!

  • Today I'll show you 10 DIY makeup ideas that work like a dream, taste amazing and are perfect

  • for pranks.

  • Mmm... -Ha?

  • Hihihi!

  • Squeeze candy is the perfect sweet treat for creating DIY makeup products, especially lip glosses.

  • It comes in so many delicious flavors and colors plus it looks super shiny, which is

  • exactly what we need.

  • Squeeze a small amount of this yummy glossiness in a little pot.

  • For this one I chose the strawberry flavor, which comes in a very light pinky red shade.

  • But I want to make my lip gloss super red so I decided to drip in a drop of red food coloring.

  • Remember that little goes a long way here so you really don't need much food coloring

  • to make the color super vibrant.

  • The last thing we got to do is to pour our deliciousness in a lip gloss container.

  • You can use a bottle of an old gloss or by these empty containers on line for very cheap.

  • Here it is - a beautiful, super shiny lip gloss, which smells amazing and tastes even better!

  • It will give your lips a beautiful glossy red tint, plus you can have it as a sweet

  • little treat.

  • I love how you can make these in all the possible colors.

  • I also wanted to try the berry flavor.

  • Here I squeezed the candy directly into the lip gloss bottle.

  • To make the color brighter and more potent I added a drop of blue food coloring.

  • Mix it up or shake a little bit and you get a gorgeous bright blue lip gloss!

  • I can't get over how amazing this DIY is.

  • Squeeze candy lip glosses are seriously the best and comparing to usual glosses they are

  • way more affordable.

  • Check out how beautifully they work, so cool right?!

  • Now our lips will always look pretty and shiny, plus we'll have a delicious sweet candy always

  • on hand. Priceless!

  • Ha?

  • Want some?

  • No!

  • No worries, this bronzer is completely edible and delicious.

  • Besides that it will give your skin a beautiful sun-kissed glow.

  • Get your container ready – I am using a pot of an old bronzer that I washed thoroughly.

  • Grab the only ingredient you will need and that iscocoa powder.

  • All we got to do is to place about a tablespoon of product into our container and pack it

  • down really well.

  • If you don't press the powder down super tight you end up with more like a loose bronzing

  • powder, which honestly works just as great.

  • Cocoa is broadly used to make bronzers even by the well known cosmetic brands.

  • So why not making our own for way cheaper, right?!

  • If you want to make a lighter color you can mix in a bit of corn starch.

  • To get a super dark version use a non sweetened 100% cocoa powder.

  • This bronzer will keep us looking fresh and glowing, as if we just came back from a vacation

  • by the sea.

  • Dust it on your face to warm up your complexion or make delicious, warming hot cocoa.

  • The beauty of edible DIY makeup!

  • Nom, nom!

  • Little mints are a perfect pick me up treat when you want to feel a bit more fresh.

  • Today we are transforming them into a gorgeous lip scrub that looks exactly like a frozen

  • arctic ocean.

  • Pour a bunch of mints into a zip lock plastic bag.

  • Place it on a wooden board or other sturdy surface and crush the mints into smaller pieces

  • using a hammer.

  • Pop a tablespoon or two of these crushed goodies into a container.

  • Add a spoonful of sugar.

  • I happened to have blue sugar at home but the usual white one works just as great.

  • Lastly you want to squeeze on a bit of honey or any other syrup.

  • It's time to mix all of our scrub ingredients together and check out how beautiful this looks!

  • Our mint scrub looks so icy and fresh, literally like the frozen arctic sea.

  • Peppermint essential oil is widely used in plumping lip glosses as it makes your lips

  • look fuller and more pouty.

  • Your mints lips scrub will first off exfoliate your lips and remove dead skin cells on the

  • surface, leaving lips soft and smooth.

  • The peppermint found in the mints will plump up your lips, making them fuller and more

  • voluminous.

  • On top of that your mints lips scrub is completely edible and tastes delicious.

  • A complete life saver in situations when you need some extra freshness!

  • Hi.

  • Hi!

  • Did you know that you can make an amazing liquid eyeliner using just two ingredients

  • that you can find in your kitchen?

  • This eyeliner is so affordable, works amazingly and you can make it in any color you want!

  • Prepare your eyeliner container.

  • I am using this adorable owl pot, which is from an old lip balm that I have used up.

  • Load a teaspoon with coconut oil and pop it in your container.

  • Now chose the food coloring you want to use, I decided for blue.

  • It is really important that you use food coloring in a dust form because liquid or gel versions

  • do not mix with oil.

  • So dust food coloring is the way to go.

  • Give the eyeliner a good stir to combine ingredients evenly.

  • Voila our two ingredient eyeliner is done so it's time to test it out!

  • Look at that, I works like a dream!

  • Now you know that next time you run out of eyeliner, there's no need to stress out.

  • All you need to do is make a short trip to the kitchen and mix it up yourself.

  • People say that you should never put on your skin stuff that you can't put in your mouth.

  • Well this eyeliner is 100% edible and there are no nasty ingredients whatsoever.

  • Bingo!

  • Ew!

  • What? Cheers!

  • Hmm... Is this a lip balm or a sweet potion?

  • Well actually it's both and besides that it's also a great idea to prank your friends.

  • The main ingredient? Honey!

  • I love honey!

  • It is sweet but unlike plain sugar it's also rich in antioxidants, vitamins and has anti

  • inflammatory properties.

  • I like to put it in my tea, on pancakes, or on my fruit.

  • But today I'm going to put it in my lip balm!

  • Get your lip balm container ready.

  • How gorgeous is this unicorn with its sparkly wings!?

  • Obsessed!

  • Fill the pot with honey.

  • You can totally finish here if you just need a clear lip balm, but you know me – I love color.

  • I decided to keep it classic and dripped in a bit of red food coloring.

  • One drop is more than enough so let's give this baby a quick little stir.

  • How quick and easy was that right?!

  • We got ourselves an amazing moisturizing tinted lip balm in less than 30 seconds.

  • Through the history honey has been known for its healing properties due to how naturally

  • moisturizing it is.

  • Swiping a thin coat on your chapped lips will make them baby soft in no time.

  • It's also high in antioxidants that help repair daily UV damage.

  • On top of that it tastes amazing, plus it gives our lips a shiny rosy color.

  • Especially in the winter when our skin gets extra dry this tinted lip balm is a must have!

  • Meringues have always been one of my favorite sweet treats.

  • They are light and crunchy, but once you put them in your mouth they magically melt into

  • this yummy soft deliciousness.

  • But you know what?

  • Today I'll show you can make amazing highlighter out of meringues.

  • Sounds crazy I know, but just wait until you see it!

  • Pop a few meringues in a zip lock bag.

  • Time to grab a hammer and crush them really well.

  • This isn't hard to do at all because meringues are very fragile.

  • You'll quickly end up with a very smooth white powder like this.

  • If you feel like you still have some bigger chunks left use a sifter to get rid of them.

  • That's how you get the perfectly smooth and fine powder, which is exactly what we need

  • for the highlighter.

  • To make it really shiny and glowy, grab some metallic silver food coloring in a dust form.

  • Depending on how much shine you want to get from your highlighter, put in a bit or a lot

  • of this magical sparkly dust.

  • Give it a good mix to allocate the silver dust evenly throughout the highlighter.

  • Prepare the container where you want to store this sweet glowy dust.

  • Last but not least you want pour in your powder highlight.

  • You guys will be surprised by how great our meringue highlighter works.

  • It makes your skin super shiny, but it doesn't feel weird or sticky at all.

  • I like to apply it on the top of my cheekbones for some healthy glow and sparkle.

  • It instantly makes you look more fresh and awake.

  • But the best part is that besides being an epic makeup product our highlighter is also

  • a yummy sweet snack!

  • You can have it directly from the box or dust it over pancakes, pies or fruit.

  • Whatever you decide make sure to do it in front of your friends and play a little prank

  • on them.

  • They'll be so surprised seeing you eat a real highlighter.

  • Mmm...

  • Ew!

  • Mmm... Mmm...

  • You know those cool lollipops that color your tongue?!

  • Well, I got an ideaif they color your tongue they should also color your lips.

  • So I tried it out and it works!

  • If you rub the lollipop on your lips for a minute or two, they will get all colored up!

  • Of course this calls for only one thingwe got to make a DIY tinted lollipop lipstick!

  • Wow!

  • For the packaging it's best to go for something rounded like these pretty disco ball lip balms.

  • Never throw away old lip balm containers, because you can always wash them and recycle

  • in future DIY projects.

  • Tinted lollipops come in a bunch different colors.

  • I decided to go for the most wearable one, which is red.

  • Take some cutting pliers or just strong scissors and snip away the lollipop stick like that.

  • Pop the lollipop into your container and if you like you can even glue it down with some

  • edible glue.

  • If that's not the worlds best lipstick then I don't know!

  • Quick and easy to make, super cute, tinted and edible!

  • But it's not just edibleit's actually super duper amazingly delicious.

  • It will make your lips rosy and glossy, plus you can have a yummy sweet treat always on hand.

  • You can even prank your friends with it.

  • I'm sure they'll be so confused seeing you with this out of this world epic lipstick!

  • Few things in this world are better than nutella, am I right?

  • I love to have it on my pancakes, a piece of bread or I even make a hot chocolate out of it.

  • Although let's not lieit probably tastes the most delicious straight from a jar.

  • Anyway, today we're going to use it for something quite differentwe're making a nutella lip scrub.

  • Take a large spoonful of this yummy hazelnut spread and put it in a mixing bowl.

  • Add tablespoon of classic caster sugar, which will serve as an exfoliant.

  • The final ingredient is coconut oilyou can skip it if you like, but it will make

  • the scrub a bit more liquid and easier to use.

  • Mix the ingredients together and the world's most delicious lip exfoliant is pretty much

  • done.

  • Pour it in a jar or any other container where you want to store it.

  • This looks so delicious!!

  • I just want to take a straw and have it as a drink!

  • Since presentation is important I decided to decorate my nutella scrub jar with this

  • orange bow.

  • Ta-da now it looks even more irresistible.

  • Use it to exfoliate your lips or make it as a gift for your friend.

  • If your lips are usually super dry like mine, exfoliating will make a huge difference.

  • Sugar grains will rub away all the dead skin cells while coconut oil provides moisture,

  • leaving your lips soft and smooth.

  • Last but not least nutella will make sure that the whole exfoliating experience is super

  • enjoyable for you and your tummy!

  • This scrub will keep your lips beautiful, plus it will give you chance to have some

  • delicious nutella in a sneaky way!

  • What else is missing in our edible makeup bag?

  • Hmm... mascara of course!

  • However this mascara won't just make your lashes pretty, but also healthy as it promotes growth.

  • It's like a mascara and lash serum in one!

  • To make it we will need some castor oil, which is super effective for thickening and regrowing

  • the hair or lashes.

  • Pour it into a little pot.

  • Some people use plain castor oil as a clear mascara.

  • When you apply the oil on the lashes, they instantly look nicer and more voluminous.

  • But I decided to add some color and today I'm choosing black.

  • Make sure to use food coloring in a powder form so it can mix well with oil.

  • Give it a good ol' stir and our mascara is pretty much done.

  • Pour it into an old mascara tube or a plain one that you can get on line.

  • How insanely easy it was to make a legit mascara that works great but also nourishes your lashes!

  • Let's test it out!

  • Wow this looks amazing!

  • Super natural, but still makes a huge difference!

  • The mascara is so smooth and easy to apply, so pampering for the lashes.

  • You can even use the castor oil mascara on your eyebrows if you want to promote growth!

  • Although this mascara may not be tasty for you to eat, it surely is tasty and nourishing

  • to your lashes.

  • I feel like skittles are one of the most popular and beloved candies across the globe.

  • In my DIY experiments video I showed that the colored skittles coating melts in the

  • warm water.

  • Check it outthe water turns red.

  • So my guess issince saliva is kind of like a warm water, the skittles should color

  • up our lips too, right?

  • Let's try it and find out!

  • To make a skittles lipstick you will need 4 skittles and some edible glue.

  • Apply some edible glue on the skittle and apply another little skittle on top.

  • We're basically building a skittle tower.

  • You can use just one color of skittles for your lipstick or make it rainbow-y like me.

  • I chose orange, blue, yellow and lastly a red one.

  • To finish up simply place the skittles tower into an empty lipstick container and you are done!

  • I love how cool this lipstick looks!

  • So different from the usual ones and so much more delicious.

  • I think it's so awesome that when the skittles are inside the tube, this literally looks

  • like a normal lipstick.

  • No one would've thought there's actually yummy skittles inside.

  • And this makes it perfect for pranks!

  • What a great DIY especially if you want to enjoy some yummy candy in a sneaky way!

  • Surprise!

  • I just created a new Beep Beep channel where I'll be weekly compilations of my best DIYs,

  • pranks and hacks.

  • Make sure to subscribe because I'm already running to upload my first video.

  • OK, bye!

Not all makeup is edible, but yours can be!

字幕と単語

ワンタップで英和辞典検索 単語をクリックすると、意味が表示されます

B2 中上級

DIYの食用メイクアップの悪ふざけ10の面白いいたずらとライフハックとDIYのメイクアップチュートリアル (DIY Edible Makeup Pranks! DIY Makeup Tutorial with 10 Funny Pranks and Life Hacks)

  • 59 3
    pon に公開 2021 年 01 月 14 日
動画の中の単語