Placeholder Image

字幕表 動画を再生する

  • Welcome To HOW TO COOK THAT I am Ann Reardon and today we are making a new Instagram logo

  • dessert, with a crispy base, cinnamon donut flavoured mousse, a strawberry gel and a coffee

  • cremeux with a mirror glaze on the top and the logo on top of that.

  • I made this other chocolate mousse dessert with the old logo all the way through a long

  • time ago now.

  • So many of you requested the new logo - My question to you is do you prefer the new logo

  • or the old one?

  • I'll put a poll in the cards you just need to click on the little 'i' button to get to

  • the cards in the corner there and let me know your thoughts.

  • To make the crispy base we need rice bubbles, cookies, oil and chocolate.

  • I'll put all the recipe quantities on the howtocookthat.net website for you and I'll

  • link to that below.

  • Melt the oil and the chocolate together in the microwave then stir through the rice bubbles

  • and the cookies.

  • Now you can use any cookies for this, the whole of the rest of the dessert is gluten

  • free so if you need a gluten free dessert just choose some gluten free cookies here.

  • Place a ring on a tray lined with baking paper and pour in that base mixture and just press

  • it down to form a disc.

  • Now you can of course follow me here on YouTube and also on Instagram I am @howtocookthat

  • there as well.

  • For YouTube you can subscribe by clicking the subscribe button or I'll also link you

  • below to subscribing by email and I will email you out each time there is a new video.

  • Now we are going to put that in the freezer to set hard.

  • Once it is frozen you just push the base out of the ring, and then I just want you to wrap

  • that in plastic wrap and store in the freezer until we are ready to use it.

  • Now for the strawberry gel.

  • Wash and hull all your strawberries.

  • As well as the strawberries you'll need gelatin, water and a little sugar.

  • Add the gelatin to the water and stir it through, and we are going to leave it to bloom or just

  • absorb that water and thicken up a bit.

  • Place the sugar and the strawberries into a blender and blitz them and then turn it

  • onto high to get it really smooth.

  • Pour that into a fine sieve and push it with a spoon to get everything through except the

  • seeds, the seeds make it taste a bit gritty and we don't want that.

  • Heat the gelatin in the microwave and then pour it into the strawberry puree while you

  • stir it the whole time.

  • Pour that into a ring and then weigh that down with something like a book to stop it

  • oozing out underneath and freeze it.

  • Once it is frozen to get it out just heat the edges of the ring and lift that off.

  • For the coffee cremeux you need dark chocolate, milk chocolate, coffee granules, egg yolks,

  • sugar and cream.

  • Put the chocolate into a bowl and put a fine sieve over the top and leave that to one side.

  • Then add the sugar to the egg yolks and whisk them together.

  • Pour the cream into a saucepan and you want to heat that until it just starts to boil.

  • Remove it from the heat and add a little of the hot cream into the egg yolks and whisk

  • that well.

  • And now you want to pour that into the cream and again whisking it straight away so we

  • don't get lumps of cooked egg in there.

  • Place it back over the heat and cook for just a moment until you see it starting to cling

  • to the bottom of the pan like this.

  • Immediately take it off the heat and pour it through that sieve onto the chocolate.

  • Sprinkle the coffee over the top and then leave that for a minute to melt the chocolate.

  • Stir together the coffee cremeux, this is one of my favourite bits, and then give it

  • a good whisk to mix it all together.

  • Then you want to pour that into a ring, weight it down also and freeze that.

  • Once it is frozen lift off the ring, now this will be quite soft even frozen because it's

  • going to be like a sauce when we cut into the dessert.

  • Place that on top of the strawberry gel and put it back in the freezer.

  • To make the white part of the logo we are going to use marshmallows.

  • Place them into a piping bag and microwave for 30 seconds, and now they are all soft

  • and sticky.

  • Cut a piece off the end of the bag and put some baking paper over the new Instagram logo

  • and rub it with a little oil.

  • Then pipe the marshmallow around carefully following the line of the camera.

  • At the end just slightly overlap it, the marshmallow will sink down into itself.

  • You can pipe more than one of these so that you have a choice and you can choose the best

  • one at the end.

  • And then place that in the freezer so that it can go firm too.

  • For the donut mousse we need milk, cream, vanilla, donuts, water, gelatin, sugar, egg

  • yolks, cornflour, more cream and mascarpone cheese.

  • Add the sugar and the flour to the egg yolks and stir them together well.

  • Now mix together the water and the gelatin and leave that to bloom.

  • Then in a pan add the milk, the first lot of cream, the vanilla and the donuts.

  • Put that over the heat and cut the donuts in half so they can soak up the milk.

  • Bring it to the boil then take it off the heat and leave it for about 20 minutes for

  • them to soften right up.

  • Heat it up again and then push it through the sieve or you could use a blender, either

  • way we just want to get it really smooth.

  • Then add in the egg yolk mixture and whisk that together.

  • Return it to the heat and stir it constantly until it starts to thicken and bubble.

  • Add in the gelatin and stir that through, it will thin the mixture down when you do

  • that and then add in the mascarpone, and whisk that well so that it all melts in there.

  • Remove that from the heat and you need to leave this to cool to room temperature.

  • Once it is cooled whip up the remaining cream to soft peaks like this.

  • Add then add a big scoopful of the whipped cream into the donut mousse and mix it through

  • thoroughly just to lighten the mixture.

  • Then we want to add the rest of the whipped cream and fold it though gently so that you

  • keep as much of that air in there to make it as light as possible.

  • Line the base of your container with baking paper, an ice cream container would be the

  • perfect shape for this so you use one of those.

  • And then add 5 cups of your mousse.

  • Give it a little shake to level it and place that in the freezer for about 10 minutes - leaving

  • the rest of the mousse at room temperature, we don't want the rest of it to set.

  • Add the coffee cremeux together with the strawberry gel and push them down into the dessert.

  • Top it up with more donut mousse and then add in your disc of crispy base.

  • Level off the top using the container as your guide.

  • Then you want to place that whole dessert in the freezer to freeze it.

  • For our rainbow mirror glaze you need sweetened condensed milk, white chocolate, isomalt or

  • you could use sugar, water, glucose syrup or corn syrup, cream, gelatin and a bowl of

  • water.

  • Add the gelatin leaves to the water so it can soften.

  • And then in one pan pour in the isomalt so it can melt.

  • And in another pan heat up the water, cream and glucose syrup.

  • Once the isomalt is melted and totally clear, pour in the hot cream mixture, being careful

  • because it will bubble up and steam a lot as you can see.

  • And then remove that from the heat.

  • Squeeze as much water out of the gelatin sheets as you can and add them into the pan and then

  • stir that through, they'll just melt in there straight away.

  • Then add in the sweetened condensed milk and then the white chocolate as well.

  • There are so many different glaze recipes that I've shown you how to make before, so

  • what I'll do is I'll link you to a playlist at the end of this one so you can choose different

  • flavoured glazes and different ones there.

  • Split the glaze into three containers making one slightly bigger and colour them pink and

  • yellow.

  • Split the third one and make it blue and purple.

  • Mix some of the pink and yellow to make different shades of orange.

  • And do the same with the blue and purple.

  • To get the dessert out of the container you just need to put the whole container in a

  • sink of hot water, being careful not to let it get on the actual mousse, just on the sides

  • of the container.

  • Place a cake board on top, flip it over and just slide off the container.

  • If it doesn't come off straight away you just need to pop it back in the water for another

  • 30 seconds.

  • Place that on a cup over a baking dish and then pour the yellow glaze over one corner

  • on one side and then add some light orange, then some darker orange glaze.Then add pink

  • across the middle following the shape of the pattern of how the colours go on the logo.

  • And then to the other side, add purple and then your two shades of blue.

  • Now that looks a bit like it's got definite lines and we want to blend it together a bit

  • more.

  • So what we are going to do is heat up the yellow glaze so it is a little bit warm and

  • a little bit thinner and and pour a thin layer of that over the yellow side of the dessert

  • and spread it out quickly.

  • So we just get a thin layer over the top there.

  • Now do the same with some pink, heat it up so it is warm and thin and quickly spread

  • it over the centre overlapping onto the purple.

  • And that just makes it look a lot more blended in.

  • Take the logo out of the freezer and sprinkle it with some corn starch so you can handle

  • it without it sticking to your fingers.

  • Lift it up, shake out some of that corn starch, and carefully place it on top of the dessert.

  • Then add the circle and the little dot.

  • And there you have the new logo on a dessert.

  • Let it defrost completely in the fridge and then slice into it to reveal the layers of

  • that donut mousse, the strawberry gel, coffee cremeux and the crispy base.

  • This just tastes amazing when all of those layers come together.

  • Subscribe to HowToCookThat for more of my videos.

  • You can subscribe on YouTube or email and I'll link to that below or both if you're

  • a SUPERFAN.

  • Click here for the recipe, here for more glazed desserts.

  • And Ann fan of the week goes to Franziska who made my vegan chocolate cake recipe and

  • took a great photo - if you bake one of the recipes you can upload it in the comments

  • section on the website or put it on Instagram and put @howtocookthat in your description

  • so that I can find it.

  • Make it a great week and I'll see you Friday.

Welcome To HOW TO COOK THAT I am Ann Reardon and today we are making a new Instagram logo

字幕と単語

ワンタップで英和辞典検索 単語をクリックすると、意味が表示されます

B1 中級

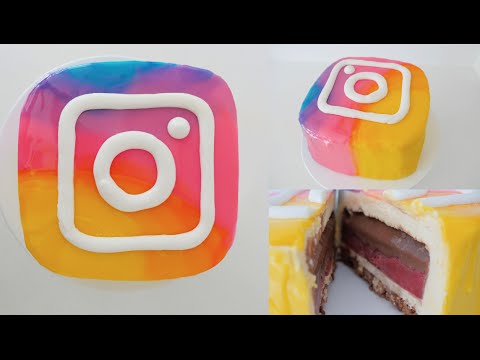
NEW INSTAGRAM LOGO MIRROR GLAZE DESSERT How To Cook That Ann Reardon (NEW INSTAGRAM LOGO MIRROR GLAZE DESSERT How To Cook That Ann Reardon)

  • 68 8
    cathy~ に公開 2021 年 01 月 14 日
動画の中の単語