Placeholder Image

字幕表 動画を再生する

  • How cool it would be if we could pimp our shoes like this? What?! Oh my god, not the

  • sky! Oh no, what have I done? Nice!

  • In this DIY tutorial I will show you how to

  • transform plain sneakers and boots into the coolest shoes you've ever seen!

  • Hey loves, I've already showed you how to transform your shirts and your shorts, so

  • today it's time for shoes. I'll show you how to pimp them from plain to amazing. We're

  • making three designs, which are all very easy to make, but look a million dollars in the

  • end. No, but seriously. All 3 pairs are so great that I cannot even decide, which one

  • I like best. So if you're ready to rock some unique and epic shoe designs too, keep on

  • watching because we're gonna get down to business. Let’s start by jazzing up these white high

  • tops into cool metallic snake skin inspired sneakers. For this DIY you will of course

  • need some sneakers. Besides you will need some fishnet tights, masking tape, scissors,

  • elastics, a container for the paint, sponge applicators, fabric paint of your choice and

  • a plastic bag or a few sheets of an old newspaper. Start by removing the shoelaces from the sneakers.

  • Then grab some masking tape and stick it all around the edge to cover the sole completely.

  • To keep the shoes stretched and without wrinkles I like to tuck in a couple of plastic bags

  • or some scrunched newspaper pieces. This will help us apply the color evenly all over the

  • sneakers. I also want to keep the shoe tongue white because I'll be using some colorful

  • shoelaces and they just pop so much more this way. And even more if you make some cool shoelace

  • designs... but youll learn that later. Take the fishnet tights and cut the legs apart

  • like so. You will need one tight leg for one shoe. Stick your shoe into the fishnet stocking.

  • It’s up to you how tight you want to pull the sock, the tighter you pull it, the bigger

  • square openings you'll have. I want the pattern to be quite full and concentrated so I am

  • not pulling the stocking too tight. Secure the net in place using two elastics. It’s

  • important that the net doesn't move while we are painting to get the clean pattern so

  • the elastics will take care of that. All right, we are now set to start painting, hooray!

  • Pour some color into a container and dip in the sponge applicator. Then color your shoes

  • by lightly pressing the sponge against the fabric. You don’t want to swipe the sponge

  • back and forth because this will probably ruin your design so it’s really important

  • to apply the color with this dabbing motion. Time to go in with gold now. I decided to

  • use three colors - silver, gold and red for some really crazy and unique snake shoes.

  • As you can see I am making diagonal stripes, they don’t have to be perfect so I am just

  • eyeing where the stripes should go. The third color I am using is red. Follow the edge of

  • the gold and make a nice red stripe next to it by pressing the sponge on the shoe. I am

  • not waiting for one color to dry, before proceeding to the next one, because I like the edges

  • to be blended nicely. You can use as many colors you like with this technique and you

  • can also switch up the pattern. Instead of diagonal stripes you could make random colored

  • patches for example. Voila, I’m all done with painting and my shoes are looking pretty

  • epic already. Let them dry for a couple of hours and when the paint is completely dry,

  • carefully cut the net along with scissors. Remove the net and look how cool these sneakers

  • are! Ok, let’s wrap it up. Remove the masking tape from the tongue and from the sole.

  • I love these clean edges you get when using the tape! We're not finished yet, no, no,

  • let’s glam these babies with some red shoelaces and epic Cray cray charms. I’m gonna show

  • you a little bit different shoelace design. Start normally by threading the lace through

  • the bottom hole. Now instead of making the normal crisscross pattern, take the right

  • shoelace end and lead it up through the second hole on the right. Do the same on the left.

  • It’s time to do the cross, so with the left shoelace end go through the third hole on

  • the right. While with the right shoelace end go through the third hole on the left. It’s

  • time for a blank space again so go through the fourth hole with the left lace end on

  • the left and with the right lace end on the right. Make the last cross from the hole four

  • to five and finally go from the hole five to six underneath the fabric to get yet another

  • blank space. Tie the shoes by making a bow, take the plastic bags out and you are ready

  • to rock these out of this world epic sneakers. I absolutely adore everything about them and

  • I think the cray cray beads go perfectly with these shoes. Cause I know, these do look totally

  • crazy but in a positive way they are crazy good looking!

  • Let’s now make these cute colorful hearts shoes perfect for all you girly girls out

  • there. You will need a pair of white sneakers, I got mine for around 8 dollars on sale. Youll

  • also need masking tape, a piece of self-adhesive paper, pencil, scissors, black fabric markers

  • and some colorful ones. Remove the shoelaces and protect the sole with a masking tape.

  • This step is actually optional because fabric markers do give you a good control over where

  • you want to apply the color. But anyway, I wanted to be sure that the sole edge will

  • stay white so I decided to protect it. Tuck one plastic bag into each shoe to get rid

  • of waves and wrinkles. If you want your hearts to be perfect and neat, make a heart stencil

  • by drawing a heart on a piece of self-adhesive paper. Cut it out and seal the cut with a

  • tiny piece of tape. I decided to make two heart stencil sizes: a big and a smaller one.

  • Stick the stencil on the shoe and outline the heart edge with a black fabric marker.

  • Remove the stencil and place it wherever you want your second heart to be. Outline the

  • shape and you get the perfect heart each time. I am first making a few big hearts and then

  • filling in empty spaces with smaller ones. I like making some heart parts on the edges

  • to get the feel that hearts are randomly sprinkled all over the sneakers. Now to my favorite

  • part! Grab some colored markers and color the hearts. First one is pink, logically.

  • Now I am going in with yellow. You can be really creative with this DIY. Switch the

  • hearts for stars or flowers and use the colors you like best. Maybe just one or two or many

  • different ones like me for a colorful explosion on your feet. When all the hearts are colored,

  • remove the masking tape and these sneakers already look so cute and lovely. But were

  • not stopping yet. How about some pink shoelaces and beads?

  • I ordered some large hole beads online for a few dollars and for the project, I decided

  • to go with these little turtles. How adorable are they? Start by normally threading the

  • shoelace through the two bottom holes. Instead of the usual cross design, let’s make a

  • sleek horizontal lines pattern. Lead the left shoelace end through the third hole on the

  • left. Take your right lace end, slide on a bead and go in through the second hole on

  • the left. Take the left lace end sticking out from the third hole, slide on a bead,

  • and lead it to the right through the third hole. With that same shoelace end go up through

  • the last hole on the right. And lead the other shoelace end up through the last hole on the

  • left. Make a bow and you are finished with these sweet and cute sneakers. How pretty

  • and happy do these look! Definitely a statement piece to any outfit. I have been loving colorful

  • shoelaces lately and all the cool designs you can make with them. So even if you don’t

  • want to permanently transform your shoes, you can have fun with beads and shoelaces

  • of different colors. It’s like having a new pair of shoes every day!

  • The last shoes we are making today are these amazing galaxy boots! The technique can totally

  • work on a black pair of sneakers, but these boots were only 10 dollars on sale, so I just

  • had to get them! Beside a pair of black boots or sneakers, youll also need masking tape,

  • scissors, container for paint, sponge applicators, a paint brush, and fabric paints: I’m using

  • white, medium blue and pink. Start by sticking masking tape pieces all around the edge of

  • the sole. We want to keep the sole black so we need to protect it before we start painting.

  • This way, we can paint quickly without worrying that the sole will catch some color. Remove

  • the shoelaces to prepare your shoes for the painting part. As said, I have a white, blue

  • and pink fabric paints. To get a nice gradient from white to dark blue, I would need a few

  • different shades of blue, so I’m going to mix a light blue shade myself. Simply add

  • a drop of darker blue into white, mix well and voila you get a perfect light blue for

  • your galaxy. OK, now we have all our colors ready and we can start painting! I like to

  • start with dark blue applying it in a half ring like so, leaving the center black. Try

  • to concentrate the paint on the inner edge of the ring and blend it into the black on

  • the outer edge. Now it’s time to fill the center white. I like to add a touch of pink

  • right in the center of the galaxy to make it even more awesome. If you look at galaxy

  • pictures youll notice that it consists of some purple, pinks, even red and green

  • colors. You can use all of these for your galaxy shoes. There are probably around 170

  • billion galaxies in the observable universe, so I am capturing a few of them on my right

  • shoe. Feather the color into the dark blue for a nice gradient effect. Make short strokes

  • in the direction from inner to the outer edge of the ring like so. You can keep the tongue

  • black but I decided to go all out and add another galaxy on it.

  • There are galaxies with as few as ten million stars and galaxies with up to a hundred trillion

  • stars, which I can’t even imagine how much that is right now, but it sounds like a lot.

  • So take a precise paint brush, dip it in white fabric paint and go crazy with stars. I am

  • drawing some bigger stars first. Then fill the space around with white dots. For bigger

  • dots I’m using a q-tip, for smaller a toothpick or a dotting tool. I like making white dots

  • in the center of the galaxy and then light blue ones further away. Also make sure to

  • draw a lot of stars closer together in the center of the galaxy and then fewer and fewer

  • as you move away. It's very important to use dark fabric paint whenever you are working

  • on dark materials like these boots. As you can see my boots are made from this fabric

  • material that’s why the color sticks to it so nicely. Just a few final dots and we

  • are all done with our galactic boots. Remove the masking tape and look at this masterpiece!

  • Perfection! Put on the shoelaces. This time I kept my normal black shoelaces because there’s

  • so much going on with these boots already that some bright colored shoelaces would just

  • be too much. And that’s it! I love how these boots look, so cool and unique. They will

  • be my favorite winter shoes for sure. So these were my three DIY shoes designs,

  • I really hope you guys like them and let me know in the comments, which was your favorite,

  • snake, galaxy or hearts, because I really want to know. I love making DIY clothes tutorials

  • so if you like watching them, just thumbs up this video. That way, I'll know that I

  • should film more clothes DIYs. But yeah, I hope you guys are having an amazing fall so

  • far and that you're doing great. I love you and I'll talk to you soon. Bye!

  • Cool shoes are normally super pricey. So why not buying a plain cheap pair and pimp it

  • yourself instead. Youll end up with a beautiful designer piece, with the designer being you.

How cool it would be if we could pimp our shoes like this? What?! Oh my god, not the

字幕と単語

ワンタップで英和辞典検索 単語をクリックすると、意味が表示されます

B1 中級

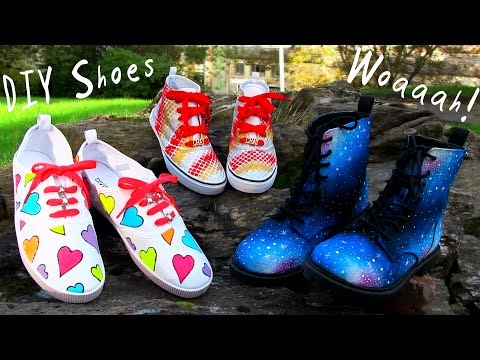
洋服をDIY!靴をDIYする3つのプロジェクト(スニーカー、ブーツ、ファッション、その他)。スゴイ! (DIY Clothes! 3 DIY Shoes Projects (DIY Sneakers, Boots, Fashion & More). Amazing!)

  • 76 9
    k92214 に公開 2021 年 01 月 14 日
動画の中の単語