Vocabulary
- just kind of: なんとなく
- in bloom: 開花して
- first off: まず最初に
- to let: 賃貸用の、貸し出し中
- going on: ~し続ける
- finish up: 仕上げる
- over the top: 大げさな
- stay in: 家にいる
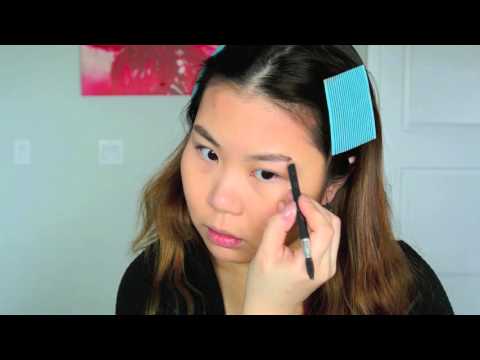
- eyebrow pencil: 眉ペンシル
- in the end: 結局
- drag out: 長引かせる
- at the same time: 同時に
- same time: 同時
- come from: 〜から来た
- check out: チェックアウト
- thumbs up: 賛成
- bit: 馬銜(はみ)
- apply: 塗る
- line: 境界線
- foundation: 土台 : 礎 : 基礎 : 基盤
- fluffy: ふわふわの
- face: 覆う
- blend: 混ぜる
- add: 追加する
- shade: 日陰
- dark: 黒い
- brush: 軽く触れる : かすめる
- skin: 誰かを簡単に打ち負かす
- brown: 茶色の
- palette: パレット
- beauty: 美しさ
アプリで完全な体験を
いつでもどこでも学習、文章と使い方を詳しく解説
01:03
She took a brave step forward, leaving behind her comfort zone to chase her dreams.
単語・フレーズ
- brave
adj. 勇気のある
- comfort zone
phr. コンフォートゾーン
文の解説
a brave step は名詞句で、brave は形容詞として名詞 step を修飾し、「勇敢な一歩」を意味します。
forward は副詞として step を修飾し、「前へ」を意味します。
この句全体が目的語となり、took(動詞)の「何を」に答えています——彼女は勇敢な一歩を前へ踏み出した。
アプリで完全な体験を
いつでも単語を調べて、発音・品詞・使い方をマスター
brave
US/brev/
UK/breɪv/
adj.勇敢な
v.t.勇敢に立ち向かう
A2 初級
アプリで完全な体験を
いつでもどこでもスピーキング練習、即時に発音フィードバック
Try this speaking exercise.
この文を真似して練習してみましょう。
80