
appearance
US /əˈpɪrəns/
UK /əˈpɪərəns/
- n.外見;状況
A2 初級TOEICもっと見るas well as
US /æz wɛl æz/
UK /æz wel æz/
- adv.~と同様に…も
- prep.〜に加えて
- conj.~と同様に
A1 初級もっと見るasset
US /ˈæsˌɛt/
UK /'æset/
- n. (c./u.)資産 : 貴重なもの
A2 初級TOEICもっと見るassign
US /əˈsaɪn/
UK /ə'saɪn/
- v.t.割り当てる;譲渡する
B2 中上級TOEICもっと見るbump
US /bʌmp/
UK /bʌmp/
- v.t./i.ぶつかる;ぶつかる
- n.ドンという音;でこぼこ
- v.t.もとのところを外されて、違う場所にいく
B1 中級もっと見るby default
US /baɪ dɪˈfɔlt/
UK /bai diˈfɔ:lt/
- adv.デフォルトで;他に選択肢がないため
component
US /kəmˈponənt/
UK /kəmˈpəʊnənt/
- n. (c./u.)構成要素 : 部品;成分;電気部品;成分;(コンピューター)コンポーネント
- adj.構成要素 : 部品
A2 初級もっと見るdefault
US /dɪˈfɔlt/
UK /dɪ'fɔ:lt/
- n. (c./u.)自動設定;契約違反;不払い;初期設定;不戦勝;欠席
- v.t./i.契約を違反する;不払いする;デフォルト設定に戻る;不戦勝する
B2 中上級TOEICもっと見るflat
US /flæt/
UK /flæt/
- n. (c./u.)アパート;平ら;フラット;フラットシューズ
- v.t./i.アパートに同居する;不発に終わる
- adv.はっきりした;平に
- adj.平らな;活気のない;ぺちゃんこの;炭酸が抜けた;一定の;つや消しの;単調な;平面的
A2 初級もっと見るfor example
US
UK
- phr.例えば
in addition to
US /ɪn əˈdɪʃən tu/
UK /in əˈdiʃən tu:/
- prep.~に加えて
- phr.~に加えて;さらに
B1 中級もっと見るin order to
US /ɪn ˈɔrdɚ tu/
UK /in ˈɔ:də tu:/
- prep.~のために
- phr.~の順に;〜するために
- adj.正常に機能して
C1 上級もっと見るin the scene
US
UK
- phr.現場に;舞台上で;事情に通じて
A1 初級もっと見るlook at
US /lʊk æt/
UK /luk æt/
- phr. v.見る;注目する;見る;調べる
A1 初級もっと見るlook for
US /lʊk fɔr/
UK /luk fɔ:/
- phr. v.(いない人 : なくなった物を)探す;期待する
A1 初級もっと見るlook to
US
UK
- phr. v.~しようとする;当てにする
A1 初級もっと見るmaterial
US /məˈtɪriəl/
UK /məˈtɪəriəl/
- n. (c./u.)衣料;原材料;原料
- adj.関連な,重要な;世俗的な : 物質的な : 物質でできた
A2 初級もっと見るpanel
US /ˈpænəl/
UK /'pænl/
- n. (c./u.)講師団;パネル;パネル;陪審員候補者名簿;(漫画の)一コマ;(衣服の)パネル
- v.t.パネル(板)を張る
A2 初級TOEICもっと見るsuch as
US /sʌtʃ æz/
UK /sʌtʃ æz/
- prep.例えば
A1 初級もっと見るsurface
US /ˈsɚfəs/
UK /'sɜ:fɪs/
- v.t.(道路を)舗装する : 新しい表面につくりかえる
- v.i.浮上する;浮上する;表面に浮上する
- adj.表面の
- n. (c./u.)表面 : 面 : 水面;うわべ : 見かけ : 外観;表面
A2 初級TOEICもっと見るtexture
US /ˈtɛkstʃɚ/
UK /ˈtekstʃə(r)/
- n. (c./u.)音楽などの雰囲気;手触り
- v.t.質感を持たせる
B1 中級もっと見るused to
US /juzd tu/
UK /ˈju:st tə/
- adj.以前(昔)はよく~したものだ
- aux. v.慣れている
- v.i.慣れている
A1 初級もっと見る
Vocabulary
- for example: 例えば
- such as: 例えば
- in order to: ~のために
- used to: 以前(昔)はよく~したものだ
- by default: デフォルトで
- as well as: ~と同様に…も
- look for: (いない人 : なくなった物を)探す
- look at: 見る
- in the scene: 現場に
- in addition to: ~に加えて
- look to: ~しようとする
- material: 衣料
- simply: 簡単に : 分かりやすく
- create: 作り出す
- flat: アパート
- project: 推定する : 予想する
- surface: (道路を)舗装する : 新しい表面につくりかえる
- texture: 音楽などの雰囲気
- appearance: 外見
- normal: 通常の
- component: 構成要素 : 部品
- panel: 講師団
- bump: ぶつかる
- asset: 資産 : 貴重なもの
- default: 自動設定
- assign: 割り当てる
アプリで完全な体験を
いつでもどこでも学習、文章と使い方を詳しく解説
01:03
She took a brave step forward, leaving behind her comfort zone to chase her dreams.
単語・フレーズ
- brave
adj. 勇気のある
- comfort zone
phr. コンフォートゾーン
文の解説
a brave step は名詞句で、brave は形容詞として名詞 step を修飾し、「勇敢な一歩」を意味します。
forward は副詞として step を修飾し、「前へ」を意味します。
この句全体が目的語となり、took(動詞)の「何を」に答えています——彼女は勇敢な一歩を前へ踏み出した。
アプリで完全な体験を
いつでも単語を調べて、発音・品詞・使い方をマスター
brave
US/brev/
UK/breɪv/
adj.勇敢な
v.t.勇敢に立ち向かう
A2 初級
アプリで完全な体験を
いつでもどこでもスピーキング練習、即時に発音フィードバック
Try this speaking exercise.
この文を真似して練習してみましょう。
80
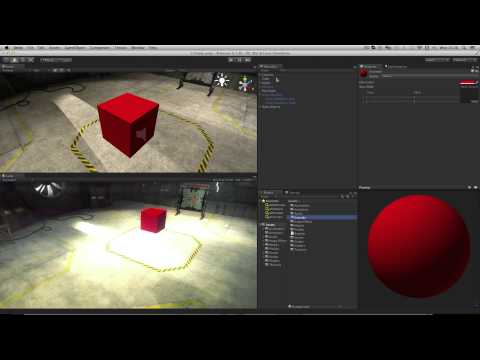
マテリアル - Unity 公式チュートリアル (Materials - Unity Official Tutorials)
0
朱瑛 が 2021 年 01 月 14 日 に投稿Unityで3Dモデルを際立たせる方法を知りたいと思ったことはありませんか?このチュートリアルでは、マテリアルやシェーダーの設定を詳しく解説し、ノーマルマップを使ってビジュアルに特別なひねりを加える方法を具体的にご紹介します。ゲーム開発で役立つ専門用語も自然に身につけられるので、あなたのプロジェクトがさらにプロフェッショナルに見えるようになるはずです!
この動画をアプリで学ぼう!
VoiceTubeアプリ版なら、効果的な学習機能がもっと充実しています!