
all over the place
US
UK
- phr.あちこちに;至る所に;まとまりがない
- adj.混乱して
A1 初級もっと見るambient
US /ˈæmbiənt/
UK /'æmbɪənt/
- adj.取り巻く : 包囲した
B2 中上級もっと見るas well as
US /æz wɛl æz/
UK /æz wel æz/
- adv.~と同様に…も
- prep.〜に加えて
- conj.~と同様に
A1 初級もっと見るat the moment
US
UK
- adv.現時点では
A1 初級もっと見るautomatic
US /ˌɔtəˈmætɪk/
UK /ˌɔ:tə'mætɪk/
- adj.無意識の;自動的な.
- n.オートマチック車
A2 初級もっと見るblender
US /ˈblɛndɚ/
UK /ˈblendə(r)/
- n. (c.)ミキサー
B1 中級もっと見るbolt
US /boʊlt/
UK /bəʊlt/
- n.稲妻;ボルト
- v.t.かんぬきを掛ける
- v.i.急に駆け出す : 急に飛び出す
B1 中級TOEICもっと見るbrass
US /bræs/
UK /brɑ:s/
- n. (u.)真ちゅう : 黄銅;吹奏楽団
- n. pl.金管楽器;真鍮
B1 中級TOEICもっと見るbuild up
US /bɪld ʌp/
UK /bild ʌp/
- phr. v.増大する;(事業などを)築き上げる;(地域に)建物をたくさん建てる;褒める
- v.t./i.築き上げる : 強化する;褒める : 励ます
A1 初級もっと見るcavity
US /ˈkævɪti/
UK /ˈkævəti/
- n.空洞;虫歯
B2 中上級もっと見るclip
US /klɪp/
UK /klɪp/
- n. (c.)クリップ : 留め具 : 留め金;テレビや映画のクリップ
- v.t.クリップで留める;刈り取る;ぶん殴る
B1 中級もっと見るcouple
US /ˈkʌpəl/
UK /'kʌpl/
- v.t.つなぐ;性的関係をもつ;ペア
- n. (c./u.)カップル;ペア;二、三
A2 初級もっと見るdeal with
US /dil wɪð/
UK /di:l wið/
- v.t./i.扱う;取引する
- phr. v.対処する;扱う;我慢する;扱う
A1 初級もっと見るdemonstration
US /ˌdɛmənˈstreʃən/
UK /ˌdemənˈstreɪʃn/
- n.表明;(集会 : 行進などによる)デモ;実演
B1 中級TOEICもっと見るease
US /iz/
UK /i:z/
- v.t./i.簡単にする;ゆっくりと入る
- n. (u.)気楽さ;容易さ
A2 初級もっと見るentire
US /ɛnˈtaɪr/
UK /ɪn'taɪə(r)/
- adj.完全な;完全な;全縁の (植物学)
A2 初級TOEICもっと見るeraser
US /ɪˈreɪsər/
UK /ɪˈreɪzə(r)/
- n.消しゴム
B2 中上級もっと見るexceptional
US /ɪkˈsɛpʃənəl/
UK /ɪkˈsepʃənl/
- adj.優れた;例外的
B2 中上級もっと見るexternal
US /ɪkˈstɚnəl/
UK /eksˈtə:nl/
- adj.外国の;外部の;外からの
A2 初級もっと見るfeature
US /ˈfitʃɚ/
UK /'fi:tʃə(r)/
- n. (c./u.)特集;特徴;顔立ち;長編映画
- v.t.特集する;特集する
- adj.特徴のある
A2 初級TOEICもっと見るfor free
US /fɔr fri/
UK /fɔ: fri:/
- phr.無料
- adj.無料の
A2 初級もっと見るfor some reason
US /fɔr sʌm ˈrizən/
UK /fɔ: sʌm ˈri:zən/
- phr.何らかの理由で
A1 初級もっと見るfunction
US /ˈfʌŋkʃən/
UK /'fʌŋkʃn/
- n.行事;関数;機能;働き;関数 (コンピューター)
- v.i.として機能する;働く
A2 初級TOEICもっと見るgoing on
US /ˈɡoɪŋ ɑn/
UK /ˈgəʊɪŋ ɔn/
- phr. v.~し続ける;(好ましくないことが)起こる;言い続ける;起こっている;基づいて;時間が経つにつれて
A1 初級もっと見るhave to
US /hæv tu/
UK /ˈhæv tə/
- aux. v.する必要がある
A1 初級もっと見るhuge
US /hjudʒ/
UK /hju:dʒ/
- adj.巨大な
A2 初級もっと見るimpressive
US /ɪmˈprɛsɪv/
UK /ɪmˈpresɪv/
- adj.印象的な;堂々とした;雄大な
B1 中級TOEICもっと見るin conjunction with
US /ɪn kənˈdʒʌŋkʃən wɪð/
UK /in kənˈdʒʌŋkʃən wið/
- phr.~と連携して
A1 初級もっと見るlayer
US /ˈleɚ/
UK /ˈleiə/
- n. (c./u.)層;覆い;重ね着;地層
- v.t.層にする
- n. (c.)採卵鶏
B1 中級TOEICもっと見るlicense
US /ˈlaɪsəns/
UK /ˈlaɪsns/
- v.t.免許を与える
- n. (u.)(言動の過度の)自由 : 気まま
B1 中級TOEICもっと見るlook at
US /lʊk æt/
UK /luk æt/
- phr. v.見る;注目する;見る;調べる
A1 初級もっと見るmaterial
US /məˈtɪriəl/
UK /məˈtɪəriəl/
- n. (c./u.)衣料;原材料;原料
- adj.関連な,重要な;世俗的な : 物質的な : 物質でできた
A2 初級もっと見るmesh
US /mɛʃ/
UK /meʃ/
- n. (c./u.)メッシュ : 網の目(をかがった糸)
B2 中上級もっと見るobject
US /ˈɑbdʒɪkt/
UK /'ɒbdʒɪkt/
- n. (c./u.)物;目的;目的語;対象
- v.t./i.反対する;異議を唱える
- v.i.瞑想する
A2 初級TOEICもっと見るocclusion
US /ə'klu:ʒn/
UK /ə'klu:ʒn/
- n. (c./u.)閉塞
C1 上級もっと見るof course
US /ʌv kɔː(r)s/
UK /ɔv kɔː(r)s/
- adv.もちろん
- phr.もちろん
- interj.承知しました
A2 初級もっと見るof use
US /ʌv jus/
UK /əv ju:s/
- prep. phr.役に立つ
B1 中級もっと見るoff and on
US
UK
- phr.断続的に
A1 初級もっと見るoption
US /ˈɑpʃən/
UK /'ɒpʃn/
- n. (c./u.)選択;オプション;オプション (コンピューター)
A2 初級TOEICもっと見るpaste
US /pest/
UK /peɪst/
- v.t.貼り付ける;のりで貼る
- n. (c./u.)ペースト;のり
B1 中級もっと見るpermanent
US /ˈpɚmənənt/
UK /'pɜ:mənənt/
- adj.永続的な;常勤の;恒久的な
- n.正社員;パーマ
B1 中級TOEICもっと見るpixel
US /ˈpɪksəl, -ˌsɛl/
UK /ˈpɪksl/
- n.ピクセル : 画素
C1 上級もっと見るpress
US /prɛs/
UK /pres/
- n.圧縮機械 : プレス機;報道機関 : マスコミ;印刷機
- v.t.アイロンをかける;しつこくせがむ : しつこく求める;印刷する;押す;しぼる
A2 初級TOEICもっと見るpreview
US /ˈpriˌvju/
UK /'pri:vju:/
- n.(映画などの)試写(会) : 予告編 : プレビュー
- v.t./i.試写する
B2 中上級もっと見るrefine
US /rɪˈfaɪn/
UK /rɪ'faɪn/
- v.t.微調整;検索を絞る;不純物を除く
B1 中級TOEICもっと見るrelease
US /rɪ'li:s/
UK /rɪ'li:s/
- v.t.自由;発表する、公開する;釈放する;手放す;発表する
- n.自由;新商品を紹介すること;解放;釈放;解放装置;権利放棄書;発表;リリース
A2 初級TOEICもっと見るrundown
US /ˈrʌndaʊn/
UK /ˈrʌndaʊn/
- adj.朽ち果てた建物;疲れた
C2 上級もっと見るrust
US /rʌst/
UK /rʌst/
- n. (u.)錆色;錆;錆
- v.i.錆びる
B1 中級もっと見るsee in
US /si ɪn/
UK /si: in/
- phr. v.見送る
A1 初級もっと見るset up
US /sɛt ʌp/
UK /set ʌp/
- phr. v.セットアップ;手配をする;たくらむ;立てる;始める;組み立てる
- v.t./i.準備する : 用意する;設立する : 創設する;引き起こす : 原因となる;陥れる : 罠にかける
- adj.準備完了
- n.設定
A1 初級もっと見るsubscription
US /səbˈskrɪpʃən/
UK /səbˈskrɪpʃn/
- n. (c./u.)(新聞や雑誌などの)購読予約金 : 会費
B1 中級TOEICもっと見るsubstance
US /ˈsʌbstəns/
UK /'sʌbstəns/
- n. (u.)本質;物質;本物;本質
A2 初級もっと見るtexture
US /ˈtɛkstʃɚ/
UK /ˈtekstʃə(r)/
- n. (c./u.)音楽などの雰囲気;手触り
- v.t.質感を持たせる
B1 中級もっと見るthink of
US /θɪŋk ʌv/
UK /θiŋk ɔv/
- phr. v.~としてみなす;考える;想像する
- v.t./i.想像する
A1 初級もっと見るtile
US /taɪl/
UK /taɪl/
- n.タイル
B1 中級もっと見るturn off
US
UK
- phr. v.消す;興味を失わせる;興味を失わせる;電源を切る;嫌悪感を抱かせる
A1 初級もっと見るused to
US /juzd tu/
UK /ˈju:st tə/
- adj.以前(昔)はよく~したものだ
- aux. v.慣れている
- v.i.慣れている
A1 初級もっと見るversion
US /ˈvɚʒən, -ʃən/
UK /ˈvə:ʃən/
- n.解釈;バージョン;新バージョン;言い分
A2 初級TOEICもっと見るwith regards to
US
UK
- phr.~に関して
A1 初級もっと見るwork in
US /wɚk ɪn/
UK /wə:k in/
- phr. v.組込む;差し込む
A1 初級もっと見るwork together
US /wɚk təˈɡɛðɚ/
UK /wə:k təˈɡeðə/
- v.t./i.協力する
A1 初級もっと見る
Vocabulary
- for free: 無料
- of course: もちろん
- set up: セットアップ
- turn off: 消す
- deal with: 扱う
- in conjunction with: ~と連携して
- see in: 見送る
- work together: 協力する
- look at: 見る
- with regards to: ~に関して
- going on: ~し続ける
- for some reason: 何らかの理由で
- have to: する必要がある
- all over the place: あちこちに
- off and on: 断続的に
- build up: 増大する
- used to: 以前(昔)はよく~したものだ
- work in: 組込む
- of use: 役に立つ
- think of: ~としてみなす
- as well as: ~と同様に…も
- at the moment: 現時点では
- sort: 分類する
- entire: 完全な
- material: 衣料
- permanent: 永続的な
- impressive: 印象的な
- texture: 音楽などの雰囲気
- substance: 本質
- version: 解釈
- feature: 特集
- bit: 馬銜(はみ)
- function: 行事
- clever: 巧みな
- deal: 扱う
- similar: よく似た
- ease: 簡単にする
- external: 外国の
- huge: 巨大な
- release: 自由
- compare: 比較する
- create: 作り出す
- reason: (論理的に)思考する : 結論を下す
- couple: つなぐ
- option: 選択
- click: 意気投合する
- clip: クリップ : 留め具 : 留め金
- press: 圧縮機械 : プレス機
- layer: 層
- object: 物
- normal: 通常の
- kind: 親切な
- automatic: 無意識の
- exceptional: 優れた
- demonstration: 表明
- program: (人が)~するように方向づける
- bring: 持ってくる : もたらす : 至らせる
- fill: いっぱいにする : 満たす
- great: 非常によく : すばらしく
- license: 免許を与える
- cavity: 空洞
- bolt: 稲妻
- subscription: (新聞や雑誌などの)購読予約金 : 会費
- refine: 微調整
- paste: 貼り付ける
- tile: タイル
- ambient: 取り巻く : 包囲した
- blender: ミキサー
- brass: 真ちゅう : 黄銅
- rust: 錆色
- mesh: メッシュ : 網の目(をかがった糸)
- rundown: 朽ち果てた建物
- pixel: ピクセル : 画素
- preview: (映画などの)試写(会) : 予告編 : プレビュー
- eraser: 消しゴム
- occlusion: 閉塞
アプリで完全な体験を
いつでもどこでも学習、文章と使い方を詳しく解説
01:03
She took a brave step forward, leaving behind her comfort zone to chase her dreams.
単語・フレーズ
- brave
adj. 勇気のある
- comfort zone
phr. コンフォートゾーン
文の解説
a brave step は名詞句で、brave は形容詞として名詞 step を修飾し、「勇敢な一歩」を意味します。
forward は副詞として step を修飾し、「前へ」を意味します。
この句全体が目的語となり、took(動詞)の「何を」に答えています——彼女は勇敢な一歩を前へ踏み出した。
アプリで完全な体験を
いつでも単語を調べて、発音・品詞・使い方をマスター
brave
US/brev/
UK/breɪv/
adj.勇敢な
v.t.勇敢に立ち向かう
A2 初級
アプリで完全な体験を
いつでもどこでもスピーキング練習、即時に発音フィードバック
Try this speaking exercise.
この文を真似して練習してみましょう。
80
0
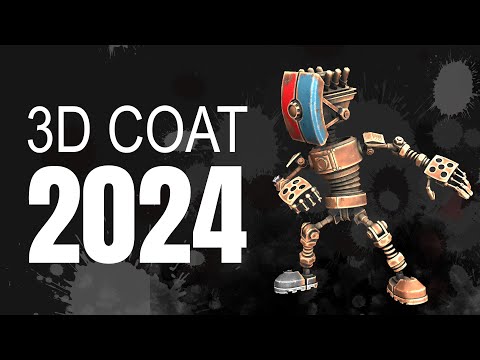
哈利 が 2025 年 02 月 19 日 に投稿Blenderで3Dアートの魔法を生み出す方法、気になりませんか?この動画では3D Coat 2024に注目し、Blenderとの連携がいかにテクスチャペイントやスカルプトで素晴らしい効果を生むかを解説します。さらに、3Dアートのスキルアップに役立つ専門用語もたくさん学べますよ!
この動画をアプリで学ぼう!
VoiceTubeアプリ版なら、効果的な学習機能がもっと充実しています!