アプリで完全な体験を
いつでもどこでも学習、文章と使い方を詳しく解説
01:03
She took a brave step forward, leaving behind her comfort zone to chase her dreams.
単語・フレーズ
- brave
adj. 勇気のある
- comfort zone
phr. コンフォートゾーン
文の解説
a brave step は名詞句で、brave は形容詞として名詞 step を修飾し、「勇敢な一歩」を意味します。
forward は副詞として step を修飾し、「前へ」を意味します。
この句全体が目的語となり、took(動詞)の「何を」に答えています——彼女は勇敢な一歩を前へ踏み出した。
アプリで完全な体験を
いつでも単語を調べて、発音・品詞・使い方をマスター
brave
US/brev/
UK/breɪv/
adj.勇敢な
v.t.勇敢に立ち向かう
A2 初級
アプリで完全な体験を
いつでもどこでもスピーキング練習、即時に発音フィードバック
Try this speaking exercise.
この文を真似して練習してみましょう。
80
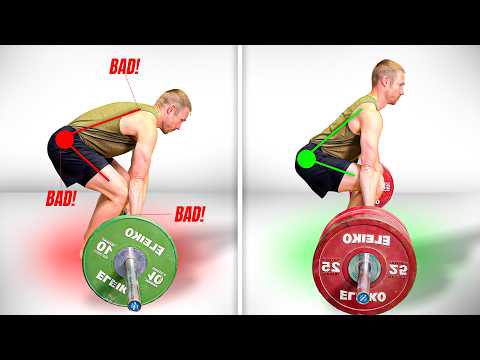
正しいデッドリフトの方法 (feat. Ed Coan & Dr. Stuart McGill) (How To CORRECTLY Deadlift (Ft. Ed Coan & Dr. Stuart McGill))
0
caffeine が 2025 年 02 月 10 日 に投稿デッドリフトで腰を痛めないための完璧なフォームを知りたいと思いませんか?この動画では、伝説的なエド・コアンスミスとスチュアート・マクギル博士が、ヒップテンションの作り方や怪我の予防法を徹底解説します。パワーリフティングやバイオメカニクスに関する高度な語彙も学べるので、英語力とリフティングスキルを同時に向上させる絶好のチャンスですよ!
この動画をアプリで学ぼう!
VoiceTubeアプリ版なら、効果的な学習機能がもっと充実しています!