
alert
US /əˈlɚt/
UK /ə'lɜ:t/
- adj.警戒して : 油断のない
- v.t.警告する
B1 中級TOEICもっと見るalign
US /əˈlaɪn/
UK /əˈlaɪn/
- v.t.整列する
- v.i.一直線になる
- v.t./i.提携する
B2 中上級もっと見るalong with
US /əˈlɔŋ wɪð/
UK /əˈlɔŋ wið/
- prep.~と一緒に
- adv.一緒に;~を含めて
A2 初級もっと見るappliance
US /əˈplaɪəns/
UK /əˈplaɪəns/
- n. (c./u.)家庭用器具
B2 中上級TOEICもっと見るassembly
US /əˈsɛmbli/
UK /ə'semblɪ/
- n. (c./u.)組み立て;集会;組み立て
B1 中級TOEICもっと見るattach
US /əˈtætʃ/
UK /ə'tætʃ/
- v.t./i.取り付ける : 添付する
A2 初級TOEICもっと見るaware
US /əˈwɛr/
UK /əˈwɛə/
- adj.気づいている
A2 初級TOEICもっと見るback onto
US /bæk ˈɑntoʊ/
UK /bæk ˈɒntə/
- phr.v.〜にバックで停める
B1 中級もっと見るcam
US /kæm/
UK /kæm/
- n.カム軸
C1 上級もっと見るcarpet
US /ˈkɑ:rpɪt/
UK /ˈkɑ:pɪt/
- n. (c./u.)カーペット
- v.t.カーペットを敷く : ~を一面におおう
B1 中級もっと見るclip
US /klɪp/
UK /klɪp/
- n. (c.)クリップ : 留め具 : 留め金;テレビや映画のクリップ
- v.t.クリップで留める;刈り取る;ぶん殴る
B1 中級もっと見るclutch
US /klʌtʃ/
UK /klʌtʃ/
- v.t.手でつかむ;クラッチを切る
- n. (c./u.)掴み;クラッチ;卵;クラッチバッグ;勝負所
- adj.重要な
B1 中級もっと見るcompact
US /kəmˈpækt/
UK /'kɒmpækt/
- n. (c./u.)コンパクトケース;協定;小型車
- adj.小型の : コンパクトな : ぎっしり詰まった
- v.t.小さくまとめる
B1 中級もっと見るdepend
US /dɪˈpend/
UK /dɪˈpend/
- v.t./i.決まる;頼る;次第である
B1 中級TOEICもっと見るdepending on
US
UK
- phr. v.頼る;〜によって
- prep.〜によって;〜を頼りにする
- ger.頼ること
- v.t./i.頼っている;〜によって
A2 初級もっと見るdisconnect
US /ˌdɪskəˈnɛkt/
UK /ˌdɪskəˈnekt/
- v.t.切断する
- n.分離
B2 中上級もっと見るdispenser
US /dɪˈspɛnsɚ/
UK /dɪˈspensə(r)/
- n.自動販売機、ディスペンサー
B2 中上級もっと見るdown with
US /daʊn wɪð/
UK /daun wið/
- adj.病気で;賛成;精通している
- interj.打倒
A1 初級もっと見るdrain
US /dren/
UK /dreɪn/
- n. (c./u.)排水溝;負担
- v.t.排出する;(エネルギー・金・力を)消耗する;減らす:減る;疲れさせる:弱くさせる
B1 中級もっと見るdust
US /dʌst/
UK /dʌst/
- v.t.粉をまぶす;ほこりを払う
- n. (u.)ほこり
A2 初級もっと見るencourage
US /ɛnˈkɚrɪdʒ, -ˈkʌr-/
UK /ɪn'kʌrɪdʒ/
- v.t.促す;励ます;促進する
A2 初級TOEICもっと見るflush
US /flʌʃ/
UK /flʌʃ/
- n.突然湧き上がる感情
- v.t./i.流す
- adj.手持ちの金をたくさんもっている
- v.t.洗い流す
B1 中級もっと見るfunction
US /ˈfʌŋkʃən/
UK /'fʌŋkʃn/
- n.行事;関数;機能;働き;関数 (コンピューター)
- v.i.として機能する;働く
A2 初級TOEICもっと見るgear
US /ɡɪr/
UK /ɡɪə(r)/
- v.t./i.に向けて準備をする
- n. (c./u.)(車の)ギア;服装 : 用具一式;歯車
B1 中級もっと見るharness
US /ˈhɑrnɪs/
UK /'hɑ:nɪs/
- v.t.自然力を操って利用する;馬具をつける
- n.引き具;活用;安全帯;ワイヤーハーネス
B1 中級TOEICもっと見るintact
US /ɪn'tækt/
UK /ɪn'tækt/
- adj.無傷の
B1 中級もっと見るlift
US /lɪft/
UK /lɪft/
- n.車に乗せること;リフト : 昇降機;持ち上げること : 上昇させること
- v.t.取り消す;持ち上げる;増やす,増加させる;取り除く
A2 初級もっと見るoff of
US /ɔf ʌv/
UK /ɔf ɔv/
- prep.〜から離れて
A1 初級もっと見るpanel
US /ˈpænəl/
UK /'pænl/
- n. (c./u.)講師団;パネル;パネル;陪審員候補者名簿;(漫画の)一コマ;(衣服の)パネル
- v.t.パネル(板)を張る
A2 初級TOEICもっと見るplastic
US /ˈplæstɪk/
UK /'plæstɪk/
- n. (u.)プラスチック
- adj.簡単に形成できる
A2 初級もっと見るplug
US /plʌɡ/
UK /plʌg/
- n.プラグ : 栓;電源プラグ;宣伝
- v.t.穴をふさぐ;宣伝する
B1 中級TOEICもっと見るpress
US /prɛs/
UK /pres/
- n.圧縮機械 : プレス機;報道機関 : マスコミ;印刷機
- v.t.アイロンをかける;しつこくせがむ : しつこく求める;印刷する;押す;しぼる
A2 初級TOEICもっと見るprocedure
US /prəˈsidʒɚ/
UK /prəˈsi:dʒə(r)/
- n.医療処置法;手順
B1 中級TOEICもっと見るproperly
US /ˈprɑːpərli/
UK /ˈprɔpəlɪ/
- adv.適切に;ふさわしく;完全に;道徳的に
A2 初級もっと見るrear
US /rɪr/
UK /rɪə(r)/
- n.尻
- v.t.育てる
- v.i.後ろ脚で立つ
A2 初級TOEICもっと見るrequire
US /rɪˈkwaɪr/
UK /rɪ'kwaɪə(r)/
- v.t.要求する;必要とする;命じる
A2 初級TOEICもっと見るring up
US /rɪŋ ʌp/
UK /riŋ ʌp/
- phr.電話をかける
- phr. v.電話する;レジに登録する
A1 初級もっと見るrinse
US /rɪns/
UK /rɪns/
- v.t.すすぐ;軽く洗うこと
- n. (u.)すすぎ;ヘアリンス;すすぐ
B2 中上級もっと見るsecure
US /sɪˈkjʊr/
UK /sɪ'kjʊə(r)/
- v.t.確実に手に入れる : 確保する;固定する;保護する
- adj.しっかり固定した : 動かないようにした;鍵のかかった
A2 初級TOEICもっと見るshaft
US /ʃæft/
UK /ʃɑ:ft/
- v.t.酷い目に遭わせる
- n.シャフト
B2 中上級もっと見るslide
US /slaɪd/
UK /slaɪd/
- n.引き出し;削減;髪留め;(顕微鏡で試料を置く)スライド;滑ること;地滑り、土砂崩れ;映写用のスライド;滑り台;スリッパ;滑ること
- v.t./i.引き出す;滑らかに動く;こっそり入る
- v.i.時間とともに悪化する;滑り落ちる;滑る
A2 初級もっと見るsocket
US /ˈsɑkɪt/
UK /'sɒkɪt/
- n.関節部のへこみ;ソケット、電気のコンセント
B2 中上級もっと見るspill
US /spɪl/
UK /spɪl/
- n.物がこぼれること;流出
- v.t./i.こぼす;情報を漏らす;容器からこぼれる
- v.t.流血沙汰をおこす;液体をこぼす
B1 中級もっと見るspill out
US /spɪl aʊt/
UK /spil aut/
- phr. v.溢れ出る
B1 中級もっと見るsqueeze
US /skwiz/
UK /skwi:z/
- n. (c./u.)絞り汁;絞ること;窮屈;強く圧力をかけること
- v.t.脅迫する、圧力をかける;搾る;押して圧力をかける;絞る
- v.t./i.人が詰め込む
C1 上級もっと見るtilt
US /tɪlt/
UK /tɪlt/
- v.t./i.傾ける;傾ける、倒す;傾かせる
- n.傾斜
B2 中上級もっと見るturn off
US
UK
- phr. v.消す;興味を失わせる;興味を失わせる;電源を切る;嫌悪感を抱かせる
A1 初級もっと見るtwist
US /twɪst/
UK /twɪst/
- v.t./i.ねじる;曲る;曲げる;捻じ曲げる;ねじる;巻きつける;向きを変える;ねじれる;捻挫する
- n. (c./u.)カーブ;方向転換;話の展開;事態の変化
A2 初級もっと見るwiggle
US /ˈwɪɡəl/
UK /'wɪɡl/
- v.i.小刻みに動く
C1 上級もっと見る
Vocabulary
- turn off: 消す
- along with: ~と一緒に
- spill out: 溢れ出る
- ring up: 電話をかける
- depending on: 頼る
- off of: 〜から離れて
- back onto: 〜にバックで停める
- down with: 病気で
- properly: 適切に
- aware: 気づいている
- position: 見解 : 態度
- squeeze: 絞り汁
- align: 整列する
- function: 行事
- alert: 警戒して : 油断のない
- drain: 排水溝
- encourage: 促す
- perform: 行う
- gear: に向けて準備をする
- require: 要求する
- panel: 講師団
- intact: 無傷の
- harness: 自然力を操って利用する
- secure: 確実に手に入れる : 確保する
- lift: 車に乗せること
- break: (記録を)破る
- clip: クリップ : 留め具 : 留め金
- press: 圧縮機械 : プレス機
- plug: プラグ : 栓
- plastic: プラスチック
- flush: 突然湧き上がる感情
- carpet: カーペット
- twist: ねじる
- depend: 決まる
- compact: コンパクトケース
- spill: 物がこぼれること
- attach: 取り付ける : 添付する
- dust: 粉をまぶす
- tilt: 傾ける
- clutch: 手でつかむ
- procedure: 医療処置法
- rinse: すすぐ
- place: (人をある状態に)置く
- rear: 尻
- slide: 引き出し
- assembly: 組み立て
- turn: ~歳になる
- pull: (たばこの)一服
- make: 用意する
- drive: やる気
- prepare: 準備する
- hold: 保管する
- case: 入れ物
- remove: 取り除く : 除去する
- wiggle: 小刻みに動く
- appliance: 家庭用器具
- begin: 始まる
- spring: ばね
- band: バンド : 楽団
- shaft: 酷い目に遭わせる
- disconnect: 切断する
- socket: 関節部のへこみ
- dispenser: 自動販売機、ディスペンサー
- cam: カム軸
アプリで完全な体験を
いつでもどこでも学習、文章と使い方を詳しく解説
01:03
She took a brave step forward, leaving behind her comfort zone to chase her dreams.
単語・フレーズ
- brave
adj. 勇気のある
- comfort zone
phr. コンフォートゾーン
文の解説
a brave step は名詞句で、brave は形容詞として名詞 step を修飾し、「勇敢な一歩」を意味します。
forward は副詞として step を修飾し、「前へ」を意味します。
この句全体が目的語となり、took(動詞)の「何を」に答えています——彼女は勇敢な一歩を前へ踏み出した。
アプリで完全な体験を
いつでも単語を調べて、発音・品詞・使い方をマスター
brave
US/brev/
UK/breɪv/
adj.勇敢な
v.t.勇敢に立ち向かう
A2 初級
アプリで完全な体験を
いつでもどこでもスピーキング練習、即時に発音フィードバック
Try this speaking exercise.
この文を真似して練習してみましょう。
80
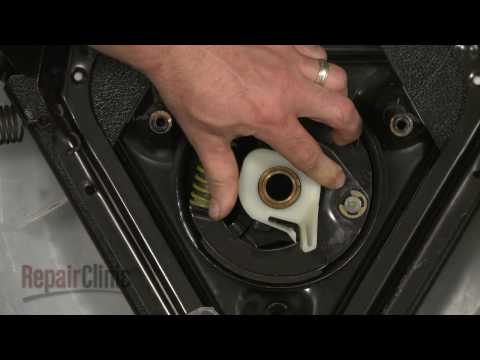
クラッチバンド&ライニング修理キット(部品番号#285790) - Whirlpool/Kenmore 洗濯機修理 (Clutch Band and Lining Repair Kit (part #285790) - Whirlpool/Kenmore Washer Repair )
0
Why Why が 2020 年 08 月 06 日 に投稿洗濯機から変な音がしませんか?この動画では、クラッチバンドとライニングキットの交換方法を、DIYが好きなあなたのために分かりやすく解説しています。家電修理に役立つ語彙や、トップロード式洗濯機を自分で直すための実践的なスキルが身につきますよ!
この動画をアプリで学ぼう!
VoiceTubeアプリ版なら、効果的な学習機能がもっと充実しています!