Placeholder Image

字幕表 動画を再生する

  • Welcome to How To Cook That I am Ann Reardon

  • Today we are making a surprise instagram chocolate mousse. Now you've requested more dessert

  • videos, chocolate mousse and instagram so I've combined all of those requests into one

  • delicious dessert.

  • To start with we are going to need to make the coloured part of the logo. To do that

  • we need four jellos, we are going to need a red one a blue one a yellow one and green

  • one. Now I've used strawberry, lime, berry blue and mango flavours here. Mix one jello

  • at a time with cream. For all of the ingredient quantities that you need for this recipe just

  • go to the blog howtocookthat.net there is a link in the description below this video.

  • Now pour that into a saucepan and continue to stir over high heat until it starts to

  • boil. Then pour it into a heat proof dish lined with alfoil. Now I found my coloured

  • layers on the instagram logo were a bit too thick so if you are using the same sized container

  • as me perhaps only tip half the mixture in so you can get those layers thinner .

  • You can leave that to set and then once that's set make the next one but to hurry things

  • along I like to make them all at the same time. So put the red layer in the freezer.

  • Then make all your other colours the same way you did with the red one. Put the yellow

  • bowl in the fridge to cool and leave the other two on the bench. Once the red one that has

  • been in the freezer has set and the yellow is no longer warm tip the yellow over the

  • red one and return it to the freezer. Now put the green in the fridge to cool and leave

  • the blue one on the bench. Once the yellow layer is set pour over the green one on and

  • return to the freezer. Leave your blue one on the bench and by the time the green layer

  • is set the blue one will be cool and you can pour that over the top.

  • Then leave that whole thing in the freezer overnight.

  • Next make your lens and the view finder parts, I used a coke jelly but I really wasn't happy

  • with the results with it, the coke doesn't like freezing and defrosting. It separates

  • into a liquid and a weird gel not at all what I was going for. I have since experimented

  • by adding various additives like xanthum gum to it before freezing and they didn't help.

  • So we are going to abort the coke and I would recommend that you use cake for the lense

  • and the view finder instead. So just make a rectangular shaped cake and then cut out

  • circels of cake and line it up to make the cylinder shape that we need. And also cut

  • out a long rectangle for the view finder.

  • Take your deep rectangular container and draw an instagram logo in the right size, sticky

  • tape that to the outside of the container to give you a guide as to how high up the

  • different mousse needs to come. If you don't think you are very good at drawing then just

  • pull up an instagram logo on your computer screen stretch it to the right size, put a

  • piece of paper over the top and gently trace the logo over the top.

  • Take your rainbow jelly out of the freezer and remove it from the dish. If you are having

  • trouble getting it out put it in a sink filled with hot water for 30 seconds, do not let

  • the water get into the dessert it wants to be below the level of the top. Then take it

  • out of the water and you should be able to easily pull it out if not put it back in the

  • hot water for a little bit longer.

  • Remove all the alfoil and then use a sharp knife to cut a nice slice from the centre

  • of your jello. Now you can see what I was saying about my coloured layers being a bit

  • too thick for this sized instagram logo so you can adjust that accordingly when you make

  • yours. Place it in the top right hand corner leaving

  • a gap on the right hand side. Put that back in the freezer while you make your chocolate

  • mousse.

  • To make your chocolate mousse place the milk, cream and vanilla into a saucepan.

  • In a seperate bowl put your egg yolks, sugar and cornstarch and whisk them until they're

  • smooth.

  • In another bowl again put your water and gelatin, stir that well and then you leave that there

  • to bloom or to absorb the water.

  • Heat the cream mixture on the stovetop until it boils, then add that a little at a time

  • into the egg yolk mixture, stirring it really well after each addition. Once it is all combined

  • then pour that all back into the saucepan. Return it to the heat and stir it continuously

  • don't walk away keep stirring it or you'll get lumps. And stir it until it thickens and

  • then for at least 30 seconds longer, and what this does stirring to while its boiling is

  • it lets all the starch granules from the flour burst which helps to thicken it but it also

  • gets rid of that floury taste. Remove that from the heat, stir in your gelatin

  • which will now be a congealed type mass. Keep stirring until the gelatin is melted, this

  • will make the mixture go thin again. Melt your chocolate, it does not need to be kept

  • in temper just melt it carefully so that you do not burn it and mix it together with the

  • custard. Leave it to cool. You should be able to feel it with your finger and it shouldn't

  • feel warm at all.

  • Whip the remaining cream. In australia pure cream or thickened cream

  • or pouring cream are all good, if you are in the USA then heavy cream is what you want.

  • If it is called something else where you live then let us know in the comments what it is

  • called so that I know what to refer to it as in the recipe for everyone .

  • And use a spatula fold the chocolate custard mixture into the cream. scooping around from

  • around the bottom up to the top of the bowl so that you keep as much air in the mixture

  • as possible.

  • Pour some of this mousse over the coloured part, making sure it goes right down and into

  • thte gap, You don't want to have a big gap on your logo, so if you need to if move it

  • over put the mousse into place and then push back the coloured section over to the side.

  • Put a thin layer of mousse on the base. Then cut your cake into a log rectangle out of

  • your cake, remember I am using jello here but I recommend you use cake instead. and

  • pour over the rest of the mousse making sure it comes up to the level marked on the side

  • of you container. Smooth it out as best as you can. Place that whole thing in the freezer.

  • To make your white chocolate mousse do it exactly the same wasy as you just made your

  • dark chocolate mousse. but using melted white chocolate instead.

  • It tastes a bit like vanilla ice cream in a mousse, it's really delicious. Once you've

  • got your white chocolate mousse ready take your frozen darker chocolate mousse out of

  • the freezer and using a spoon or ice cream scoop scrape down the middle so you have like

  • a valley where the lens is going to go. You want it to be a rounded shape there. Looking

  • at your logo that you have stuck to the side to see how far down the lens needs to go.

  • Just keep scooping out until you've got it to the right level. Then add a little bit

  • of your white chocolate mousse down in that valley and then put your lens bit down over

  • the top. Now I am wanting you to use cake here just line up all your circles of cake

  • to make along cylinder pushing them together well so that the mousse doesn't go in the

  • gaps. Pour over the rest of the white chocolate mousse over the top. Smooth it out and put

  • the whole thing in the freezer to set.

  • To make your base, melt together the butter and chocolate and mix through some rice bubbles

  • or rice krispies. Spread it evenly over the dessert using the back of a spoon to smooth

  • it out so that you have a flat base. And this give a nice crisp texture to the dessert.

  • Put is back in the freezer for 15 minutes to let that set.

  • Place the whole dessert it into a hot water bath for 30 seconds, again being careful not

  • to get any water into the dessert. Pull it out and dry off the edges with paper towel

  • Make yourself a cardboard base and cover it in alfoil it should be slightly narrower than

  • the dessert so we can round the edges. Then tip out the dessert.

  • ANd use a knife to scrape off a layer from the corners around the top and do the same

  • same at the base using a sharp knife just cut off some of the crispy base so that it

  • has the rounded edges rather than the square edges.

  • Put some cups in a baking tray and rest the dessert on top of them. The purpose of the

  • baking tray is to catch any excess glaze so we can reuse it. Generously pour your glaze

  • over the top, now the recipe for this glaze is already on the blog when you go through

  • to this recipe for the chocolate mousse I'll put a link to that video for you there. Smooth

  • the glaze over the edges. If you want a really smooth finish you can let the first layer

  • set and then pour more glaze over the top.

  • Once the glaze is set which will only take a couple of minutes transfer your dessert

  • to a serving platter. I am using a large tile. If you've go a large serving platter that

  • will be fine. Add you chocolate decorations on top, if you are new to this channel and

  • the howtocookthat blog then there are lots of videos on making chocolate decorations

  • for desserts that you can watch. I have not done one yet on making this particular sphere

  • if you want that request it below and I'll film it for you.

  • Leave the whole dessert in the fridge for at least 3 hours to let it defrost, serve

  • to the table and then slice into the dessert to reveal the instagram logo.

  • Thanks for watching click on the banner at the top to go to the channel and check out

  • some of the other videos and subscribe for more more desserts, cakes and chocolate tutorials,.

  • I'll see you all next week. Bye [music by youtube.com/setsailtv]

Welcome to How To Cook That I am Ann Reardon

字幕と単語

ワンタップで英和辞典検索 単語をクリックすると、意味が表示されます

B1 中級

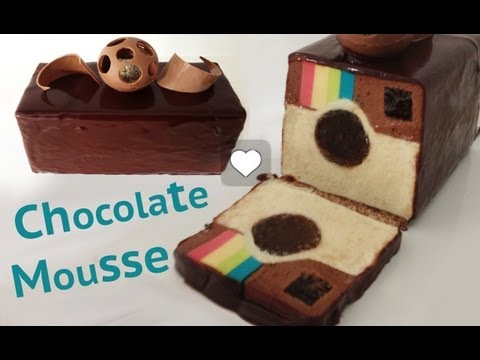
Instagram DESSERTチョコレートムースレシピケーキHOW TO COOK THATアン・リアドン (Instagram DESSERT chocolate mousse recipe cake HOW TO COOK THAT Ann Reardon)

  • 258 16
    尤弘志 に公開 2021 年 01 月 14 日
動画の中の単語